SkoolieStays

Categories
News Skoolie Stays

From Firle to Beachy Head

From Firle to Beachy Head

After an incredible first season, it was time for the Skoolie to hit the road again

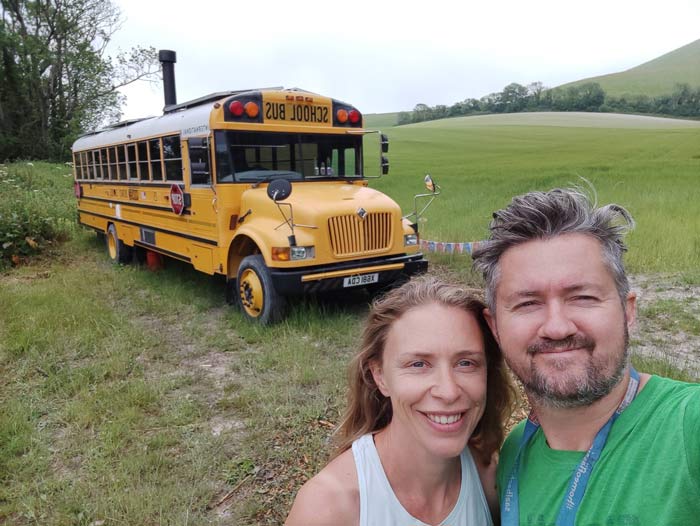
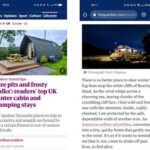
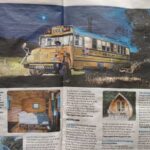
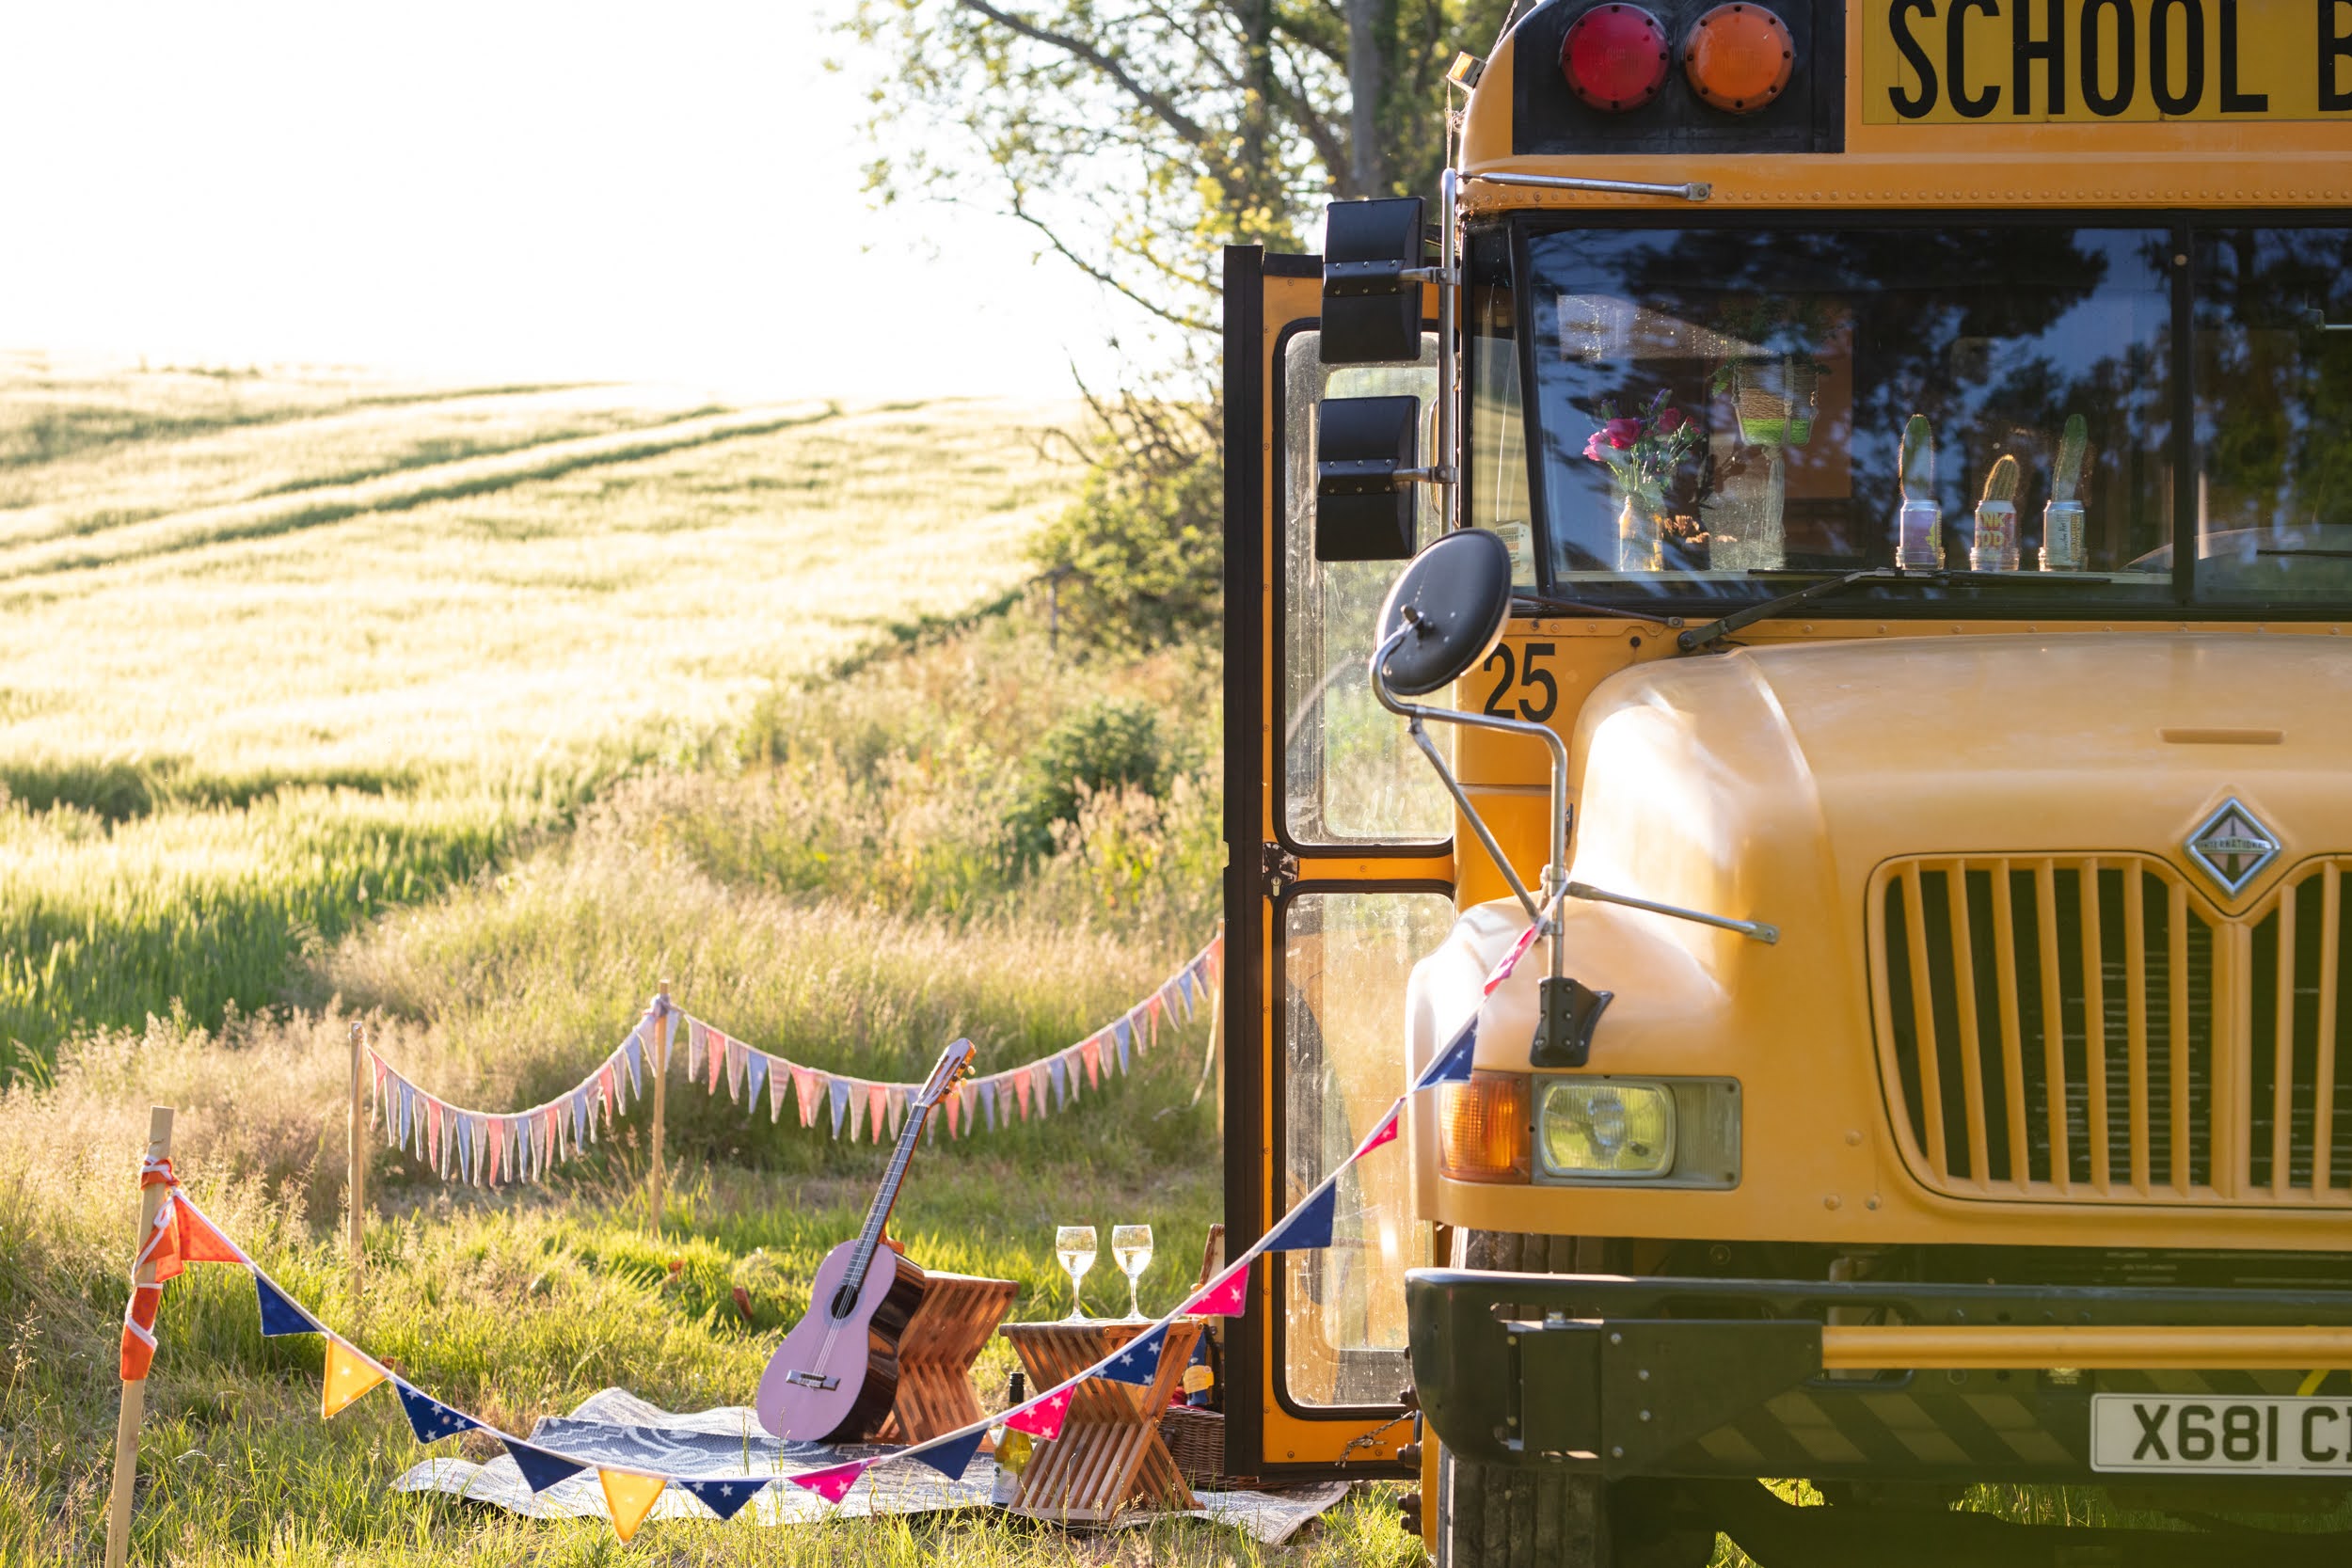
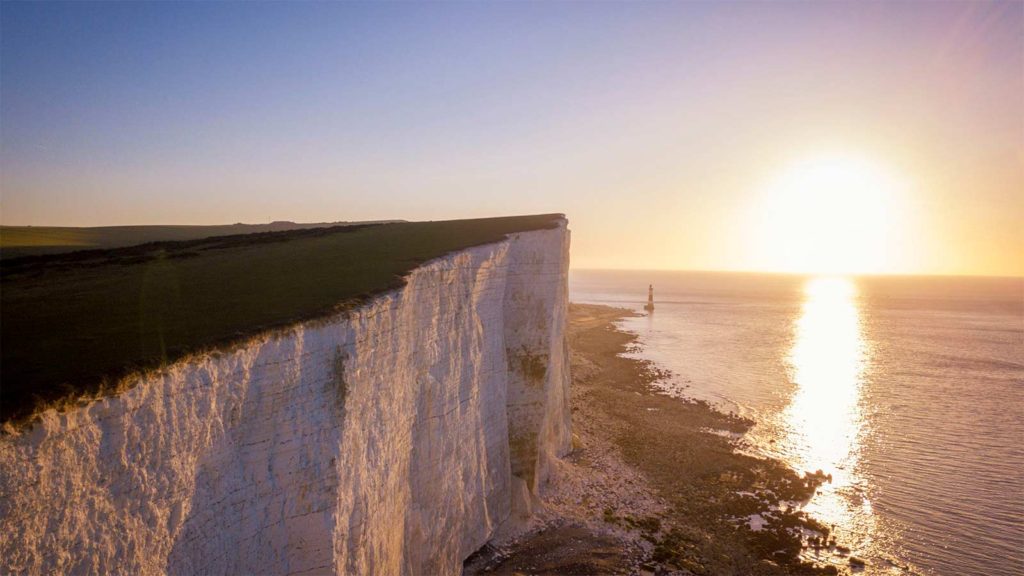
Last week we moved the Skoolie to our new location at Beachy Head. The sun was out and the drive over Seven Sisters, past the silvery swirls of the Cuckmere river, was stunning. As we drove through small villages, cars honked us and people waved, thrilled by the sight of an American yellow school bus on their road. We felt pretty happy. Our last Firle guest had given us a 5 star review, continuing our run of lovely feedback from guests,  and a news alert had popped up to tell us that not only had we featured in the i newspaper as an autumn break, we were in the Guardian travel tips for winter glamping too.  Not bad for a first season!


But what comes next?

All the fun at Firle

A fantastic first season on the farm

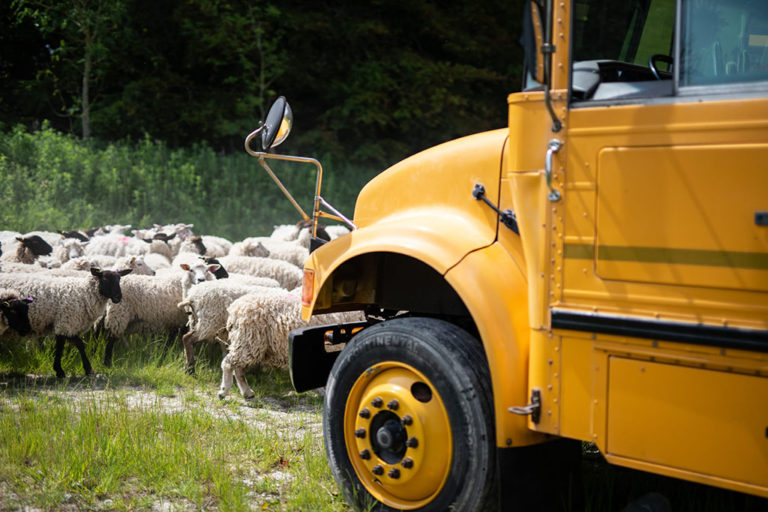
Skoolie with sheep
Life on Firle's busy farms was always interesting

We moved to Firle Estate, near Lewes, in June. They were keen to try glamping and we were more than happy to move into their beautiful spot (all 7000 acres of it) that spans the South Downs. We got some strange looks as we turned down the tiny lanes in our enormous yellow bus, but we are used to turning heads on the road – everywhere we go, people stop and stare!


We were given access to three locations across Firle and guests had access to some incredible rural locations, gorgeous sunsets and delightful walks across the Estate to reach the array of pubs, tea-rooms and farm shops that were on offer.  The glowing reviews suggest they loved it!

Moving on to something new


So why have we left? Well, all good things must come to an end. Our agreement with Firle was created so that we could offer off-grid camping on unused farmland. But no corner of a farm has empty space for long. Sheep had to be moved to different fields, rams separated, crops cut, seeds sown and shooting traps set. As our booking calendar became increasingly busy, it became a complicated process trying to work out where and when we could move.  


We made the decision to try and find a new location. We wanted one that offered us the same level of access to the stunning South Downs, with some equally great eateries and activities on our doorstep, but that also felt off-grid. We also wanted to increase our outdoors offering to guests. At Firle we had to be mindful of crops and farm buildings . For our new location, we wanted space for kids to run around and adults to set up hammocks or sit around a firepit to toast marshmallows.  

Bringing an iconic vehicle to an iconic location

where to stay near beachy head

As soon as Visit Eastbourne showed us Black Robin Farm, we could see the potential. Our own field with views of the sea, less than a mile from the stunning white cliffs of Beachy Head and the South Downs Way, within walking distance of Eastbourne’s amenities.  It was perfect. 


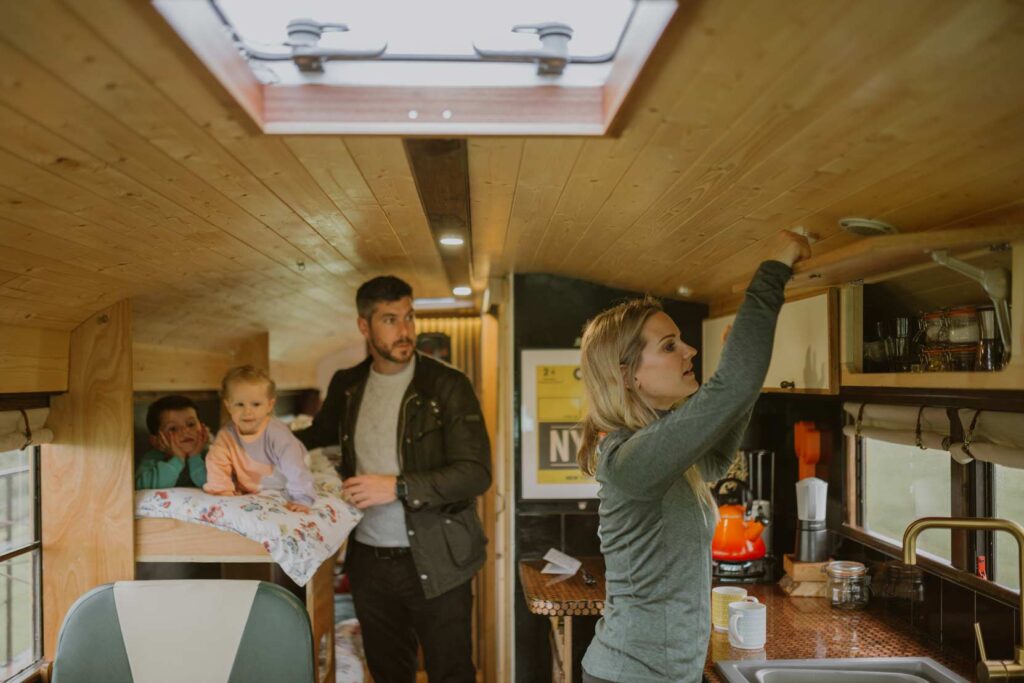
The Visit Eastbourne team were just as excited about the idea of moving the Skoolie as us. For them, our tiny home offered tourists and residents an opportunity for high-end glamping at one of their most visited tourist destinations. It also fit their vision of an environmentally-conscious glamping solution, it’s solar panels and sheep’s wool insulation making it a year-round option for those who like to escape without abandoning all the comforts of home . Besides, they had fallen in love with the epoxy countertop and the big bug-eye mirrors by then!  


We are already live on the Visit Eastbourne site and will soon be coming out in their accommodation brochure for 2022.  

From one location to....almost nowhere

Skoolie tow
The Skoolie makes a graceful exit from the muddy field

The day came for the big move and we turned on the engine. As the revs turned over, we surveyed the first obstacle – getting out of the field. Firle had received an obscene amount of rain over the past few weeks and our spot, at the bottom corner of a field, had been getting boggier and boggier. Normally, wellies suffice to get you through a muddy field, but you can’t put those on a 14-ton vehicle.  


As soon as we tried to manoeuvre out of the field, we found our wheels spinning. Disaster. Or it could have been. Luckily for us, the farmer is lovely and sent one of his boys down with a tractor to tow us out the field. Problem averted! 

But first a little pit stop....

Applying Lanoguard rust treatment

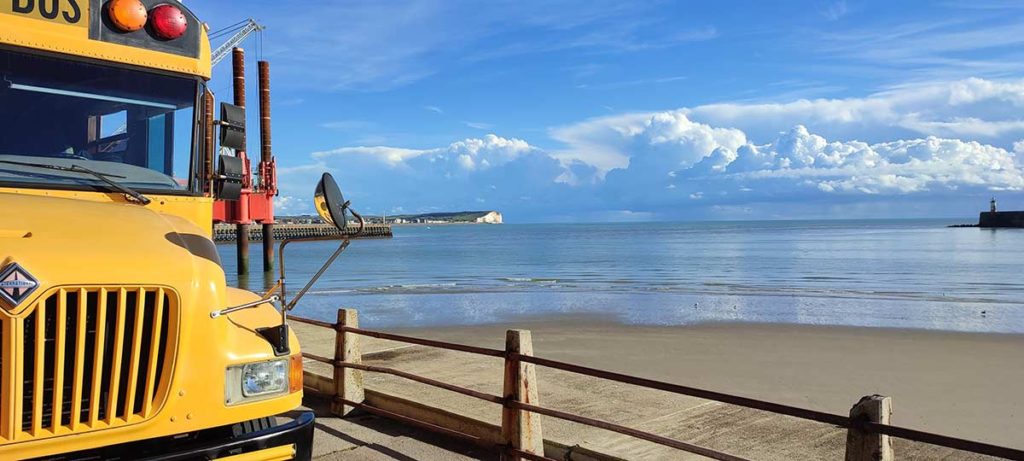
During the initial build, our friends at Lanoguard had sponsored the application of their chemical-free rust treatment, derived from lanolin, to the bottom of the bus. Knowing we were off to the salty sea air of Beachy Head, they offered to reapply, suggesting we park up at Newhaven Beach so they could film it for their social media.


A stop-over by the beach? Who could resist!


After cleaning the underbody of the bus at a local garage (it was pretty muddy!), we parked up at the beach in time for sunset. It was lovely down by the water, listening to waves lap beside us. It reminded me of the times we parked on the beach in Texas at Padre Island. Sigh.

To the distant cliffs!

View of skoolie and cliffs
The Skoolie with the cliffs at Birling Gap behind us

The drive to Eastbourne was the furthest we would had driven the bus ourselves since it arrived. Each bus is built to different specs – some are good for the mountains, others are better for the cities. Our Florida bus was one that stopped and started a lot – i.e. it didn’t get up much speed. There also aren’t many hills in that part of Florida. We could see the cliffs looming over Seven Sisters. How would it fare?


Thankfully, it was fine. It chugged slowly up the hills and descended gracefully! We made it to Eastbourne’s heritage coast, via the single file bridge at Cuckmere Valley, and one of the most beautiful views over the snaking Cuckmere river. We had no trouble with the field, not a bog in sight – I guess when you are a the top of a cliff then the water runs down!

Safely in our new home

View from skoolie beachy head
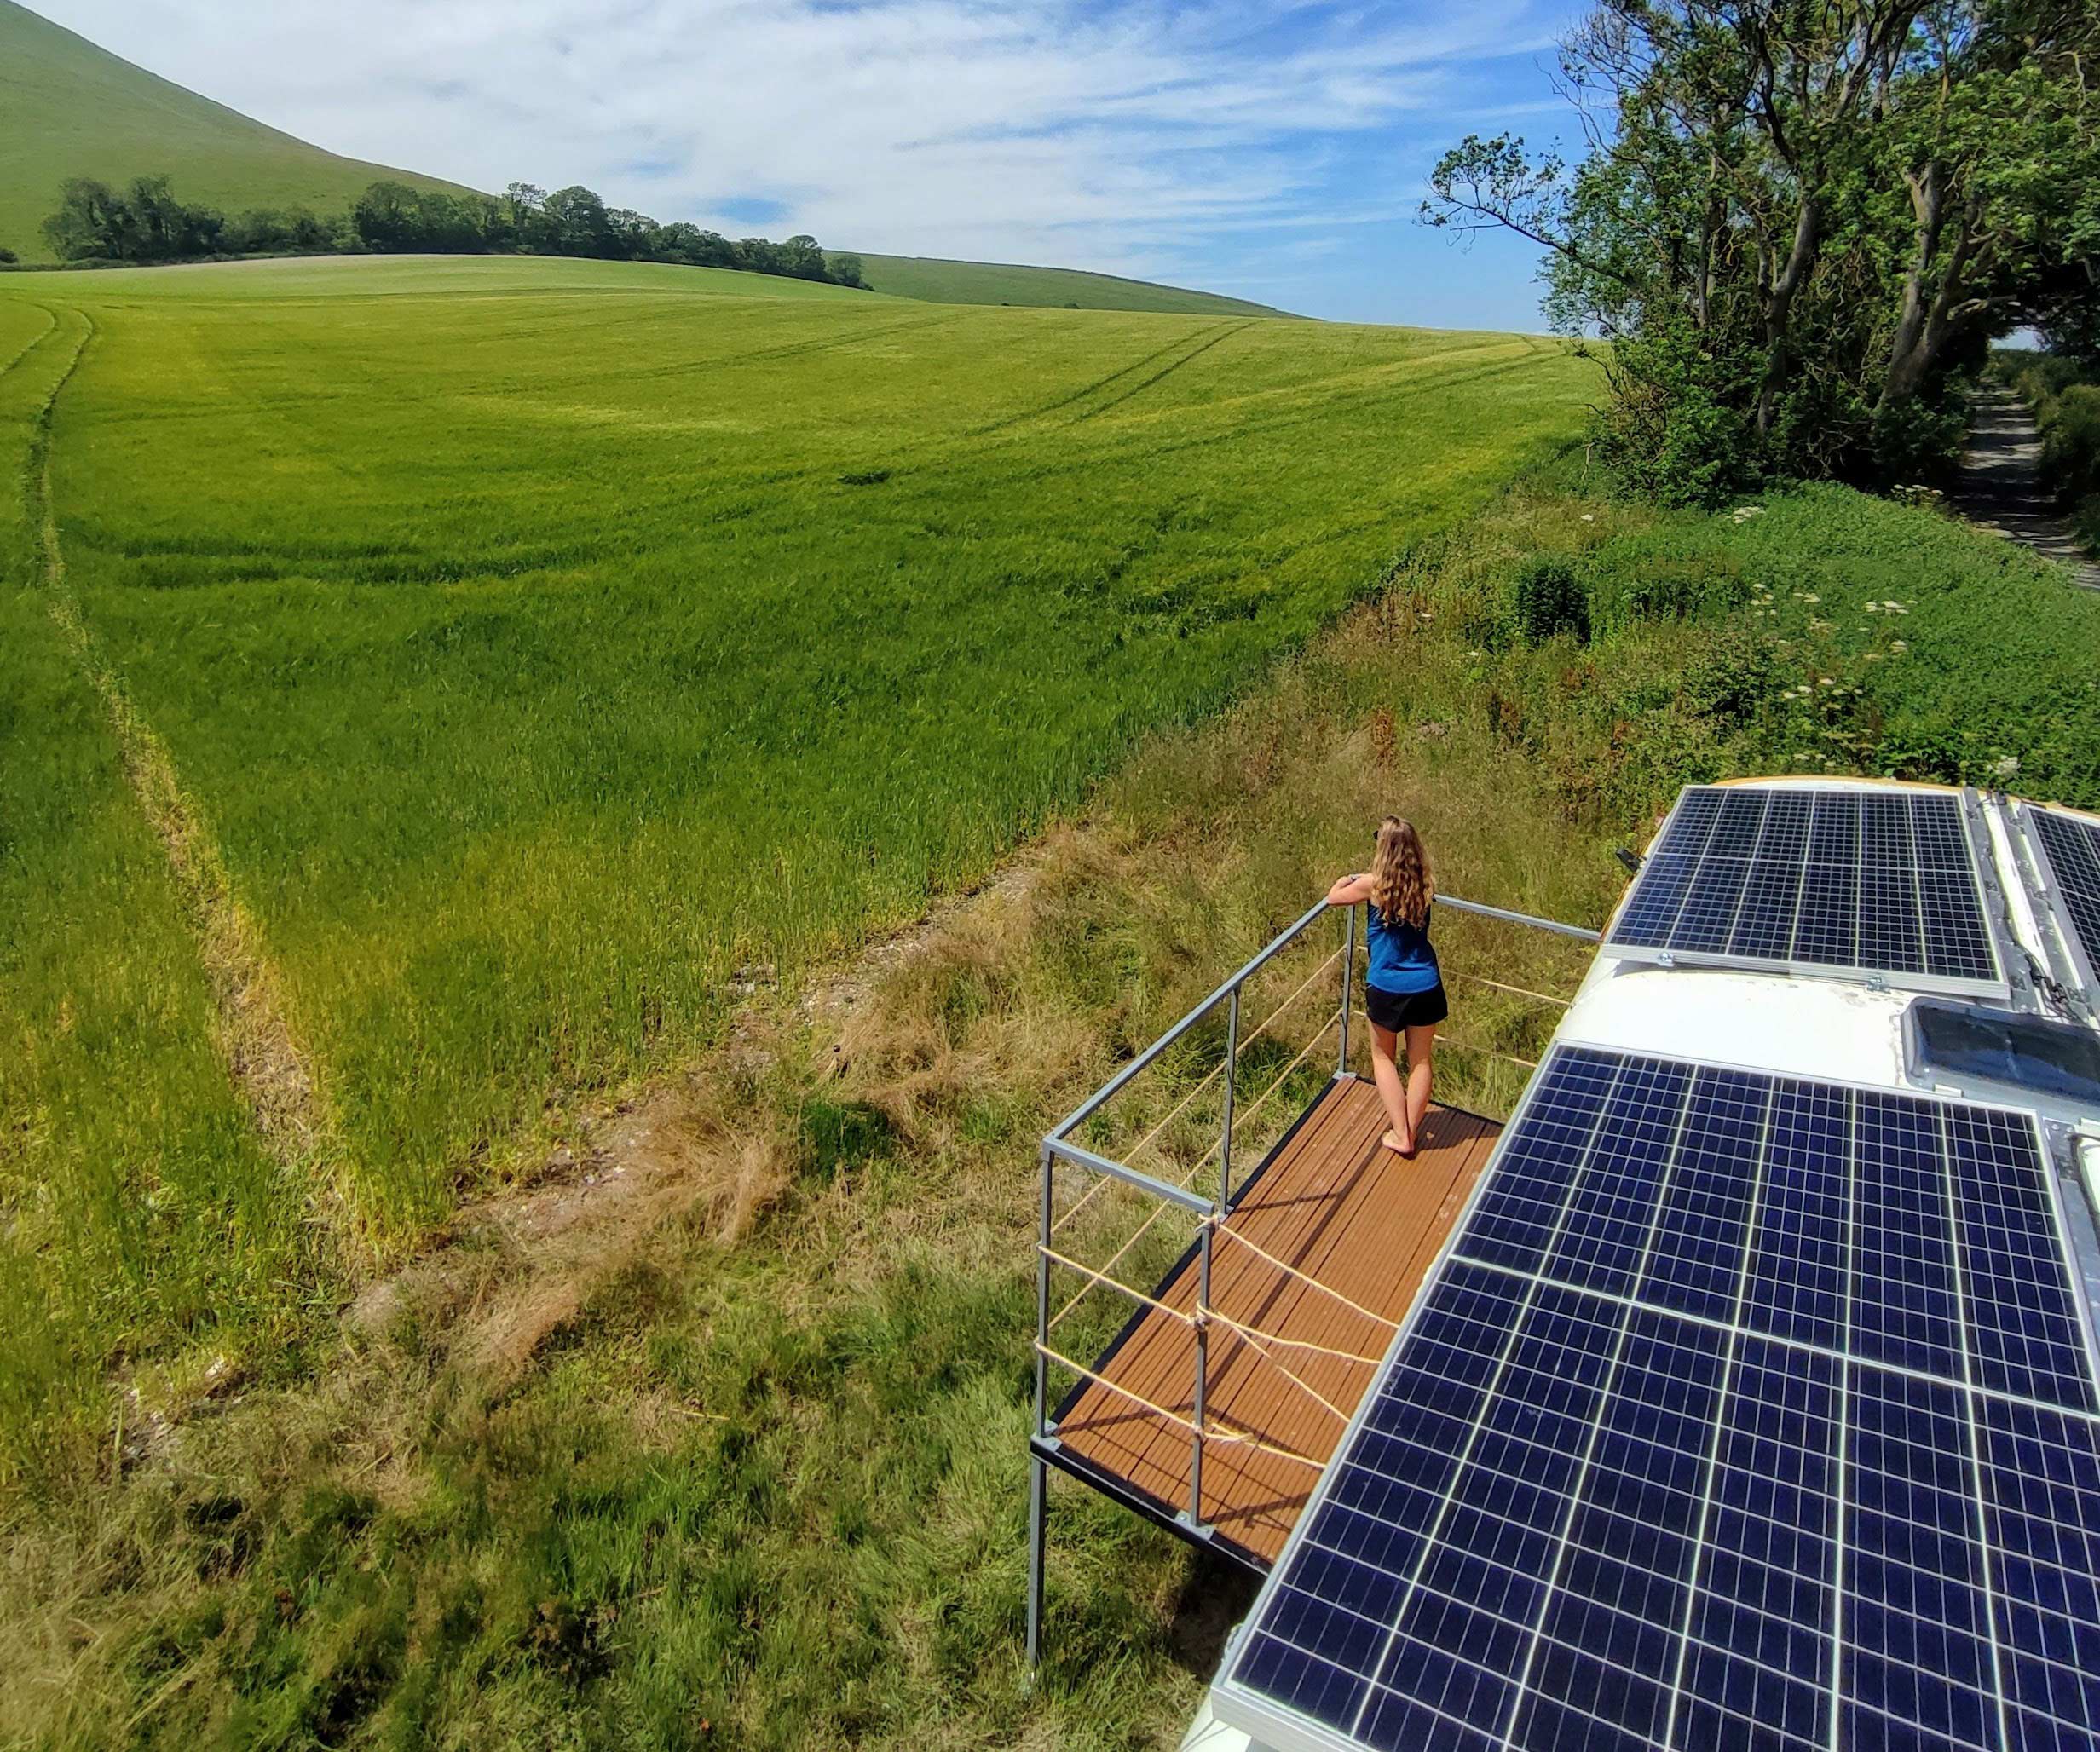
Sucking up the solar at Beachy Head

We are now happily parked up in our field at Black Robin Farm, the deck down for sunset drinks and morning coffees. It really is a beautiful spot and we feel very lucky to have access to such a stunning part of the South Downs. 

Tempted by your own Skoolie Stay? Get in touch and we can get you booked up!
Categories
News Skoolie Stays Sustainable glamping

Converting the Skoolie Stays American school bus

ruth wimpory skoolie stays

By Ruth

Buying an American school bus and bringing it to the UK is not for the faint-hearted. It takes a lot of time, skills, creativity and contacts to turn an old retired yellow bus from a different continent into a rural bolt hole in the UK.  Luckily, after travelling 14,000 miles across America in our first Skoolie, we had the confidence, ability and network to take the plunge and buy bus number 2 and launch our new business: Skoolie Stays.  

Buying an American school bus from the UK

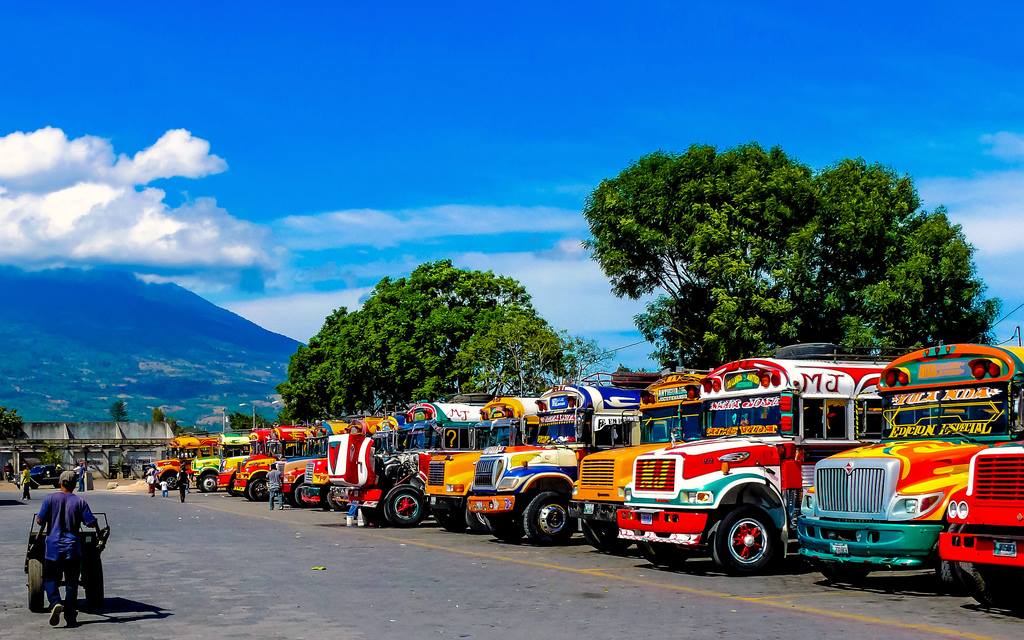
Chicken buses central america

There was a sense of de-ja-vu when it came to purchasing a new bus.  It felt very different this time though because of the financial risk. The major cost of a Skoolie project is not in the purchase of the bus – ex-school buses are plentiful in the States, so they are good value – it’s in the shipping and conversion. We needed to be sure we picked a good bus that would be worth the investment we were ready to make. When we found a bus in Florida that had our choice of engine, transmission and had the ‘dog-nose’ look we like (rather than flat-faced), as well as the interior height we sought, we had our friends check it out before we put it on the ship over to Southampton.  


In America, you buy your bus and then convert it before applying to change the registration from bus to a private vehicle. You get your insurance and hit the road. It’s a slightly more complicated process in the UK. You need an HGV license for a start. You also need to navigate the confusing world of DVLA guidelines about MOTs and imported vehicles to get your bus registered. Long story short, you need to get your MOT certificate before you begin your conversion as it needs to look like a bus in order to be assessed as a bus. We had to make a few changes to fit within UK rules and regs, but we sailed through our test and were able to send off our paperwork for registration. A few weeks later. we had our plates. 

Stay before you buy? We can help!

When your ideas are getting serious, why not come and stay with us? Spend a couple of days and nights on our Skoolie Stay. Check that head-height, get a real idea of how solid it is…and how big. Big enough? Sit and think about layouts, why not bring a measuring tape! Get in the drivers seat and try it out for size. Can you really imagine driving one?  Pick up the books on the bookshelf about Skoolie builds and our own project and meditate on your future adventure. Does you other half need persuading? Here’s a surprise weekend away that’ll help! Get in touch now and we’ll help you out with this and a friendly chat about your own school bus buying ideas. Or just check prices and book now, and give us a shout when you are ready.  – Guy & Ruth

OK, read on about how to buy your own ‘Skoolie’!

Converted bus hotel
bus glamping west sussex

First conversion job: stripping the bus

Seat removal is the first place to start with a Skoolie conversion but it’s a nasty job. Our seats were bolted onto rails, which meant they came out easily, but the rails themselves also had to go and the bolts were tricky to shift. 


It took us 3 filthy and exhausting days to remove some 500 bolts. Each one had to be angle-grinded and then hammered or drilled out. Mercifully, the wooden sub-floor was easy to wrench up. We’ve seen plenty of builds in which this stage is even worse – the glue refusing to let go of either surface – so we thanked the Skoolie gods and pulled it all back for the big reveal. What state was the floor in?


The condition of the floor is always a bit of a unknown when buying your bus. You can get an idea of rust from a survey of underneath and around the edges, but you never know until you rip the floor up what kind of state the bus will be in. It can be an expensive disaster to find a rusty, holey mess. The best way to prevent that, especially if you are buying remotely, is to purchase a bus from somewhere that stays warm(ish) and is not too near the sea, and that is built to drive on terrain similar to that which you will need it for. It’s no good heading to the Alps in a city bus that is designed to stop and start on flat roads!


Our floor was thankfully brilliant – just a touch of surface rust which is exactly what you’d expect. We sanded back the surface then treated it with de-greaser before spraying it down with a specialist metal prep. All the holes left by the bolts were filled with bits of old bus metal and pennies (the perfect size) and with the whole floor deemed waterproofed, we covered everything with a rust preventative paint, which is totally resistant to road salt, petrol, battery acid, etc, before adding a gloss top coat (which took forever to dry in the February snow!). g

Back to the metal ... and then out with half of it

Floor done, we moved onto the walls. All the unnecessary metal, fittings and insulation had to be removed, so there were a few more long days wielding angle-grinders, drills and hammers to remove the aircon units and the disabled door lift.  Dirty, dusty, achey days.


We then started on the roof, removing the two emergency exits. Climbing out the hatch to the roof-deck was one of our favourite things to do in America. They are not designed to be opened and closed as regularly as we did though, so ours broke. We wanted to avoid that this time and, as we weren’t building a deck on top, decided to replace the front exit with a glass marine hatch and the rear with a campervan-style vent. Neither were the size of the hole left by the original hatch, so we patched the hole, made a new frame to support the marine hatch (out of old bus rails) and then cut through again to fit. It worked brilliantly and now we always have a view of the sky, even when it is closed.


With the hatches done, the roof was cleaned and sanded down. All the rivets and seams were coated with silicone before a fresh coat of military vehicle paint was applied. The white top, as well as looking traditional for a school bus and making it pretty for the birds and paragliders overhead, has the added benefit of reflecting the sun’s rays and keeping the bus cooler on hot days. 

Taping out our planned layout

MArking out the space in a Skoolie

Once the interior was dry we put the insulation and the ply subfloor down. Suddenly it was starting to look like a useable space and we could dance around marking things out in tape. We had a plan already of course, but you never know how it will feel until you lay it out. Are those tight gaps workable? Can you squeeze anything better into that space?


Before we could get too excited, we hit a problem. We’d picked the worst time of year to begin our conversion. February was freezing but at least it was dry. March was wet, wet, wet. In this instance it was useful though. We arrived one soggy morning to find tell-tale wet spots below the windows. It could only mean one thing – leaky seals. This is a common problem, particularly with this style of window frame, and it was good that the issue was flagged up early in the build. Despite the foul conditions, Guy had to spend the day on a ladder re-sealing each one up while I dammed the drips with blue roll. When the wads of tissue came away dry, Guy was allowed back in again!


With a solid floor, sealed windows and our masking tape guides, we were able to start framing out the living space and lining the walls and ceiling with sheep’s wool insulation. We chose Cumbrian wool because of the eco-credentials. I also liked the idea of wrapping up the bus in a big woolly jumper, even though it smelt like a farmyard for a few days until we got the waterproof membrane taped on top.

Getting down and dirty with the plumbing and heating

Plumbing in a Skoolie

With the inside taking shape, Guy turned his attention to the plumbing for the water and heating. It was a tricky and messy period of the build and even though he had spent hours preparing detailed schematics and timelines for ordering, it was still an almighty challenge and nothing seemed to work quite as we had planned at the first pass. When you are building a bespoke conversion you can’t always buy things off the shelf and much of the time we ended up sourcing what we needed from companies who sold pond supplies or farming equipment. The measurements varied between imperial and metric, but also seemed to be dependent on different companies interpretations of how to measure. Things would arrive and be a mm too small or wouldn’t flex in the right way. It was endlessly frustrating and kept Guy on the laptop until late at night as that was the only time he had free to research and purchase new.


We got there in the end and once we had everything mounted and working, we set about rust-proofing the exterior underbelly with Lanoguard, a sheep-wool derived rust protector. It is a brilliant product and so much better than chemical protectors. Lanoguard even came down to help us apply it. We warmed up their thick grease and painted it on the bolt holes so that it could really soak in to the newly exposed areas, then set up the pressure spray to cover the bottom in a more diluted, thinner product. Mark and Jacob got under the bus with Guy, I went to make them all tea and by the time I came back they had finished and the bus looked brand new.

Fitting out the kitchen, bathroom and living room

Building the interior of a skoolie

Back inside, the framing was done and we had the skeleton of a bedroom and bathroom, as well as a kitchen carcass. It was time to call in the specialists.

John arrived to help us with the tiling, spending days coiled up in the bathroom turning an empty space into a luxurious bathroom. Lots of people are not sure whether you can actually use ceramic tiles in a vehicle conversion, but as long as you use the right kind of flexible grout and sealant, it’s fine. 


Once the bathroom was complete, we moved on to the panelled pine ceiling and made one of many last minute design changes that have gone on to become real features. This time it was to add a long wooden backbone down the length of the bus to help ensure the slats went in neatly and evenly, but also to provide a more solid base for our spotlights. It was time for the first fix electrics. 


With Guy plumbing, John panelling, Neily working on the cabinets, Steve fitting the wiring, Marcus doing the LPG and Andy from Hove log burners lying prostate on the floor trying to fit the log-burning stove, it was quite timely that the Government chose that point to send the kids home from school. It was time for me to leave the boys and work from home! 

Repurposing the bus seats and working from home

Repurposing bus seats

My fingers may not have been as cold as the boys but it didn’t mean I could take my foot of the pedal. In between home-schooling I painted endless panels of wood , all of which had to dry in the warmth of the house, and spent hours researching and ordering bits for the bus. It was also a chance to begin work on all the creative ideas that we had been thinking about. Home-schooling art projects began!


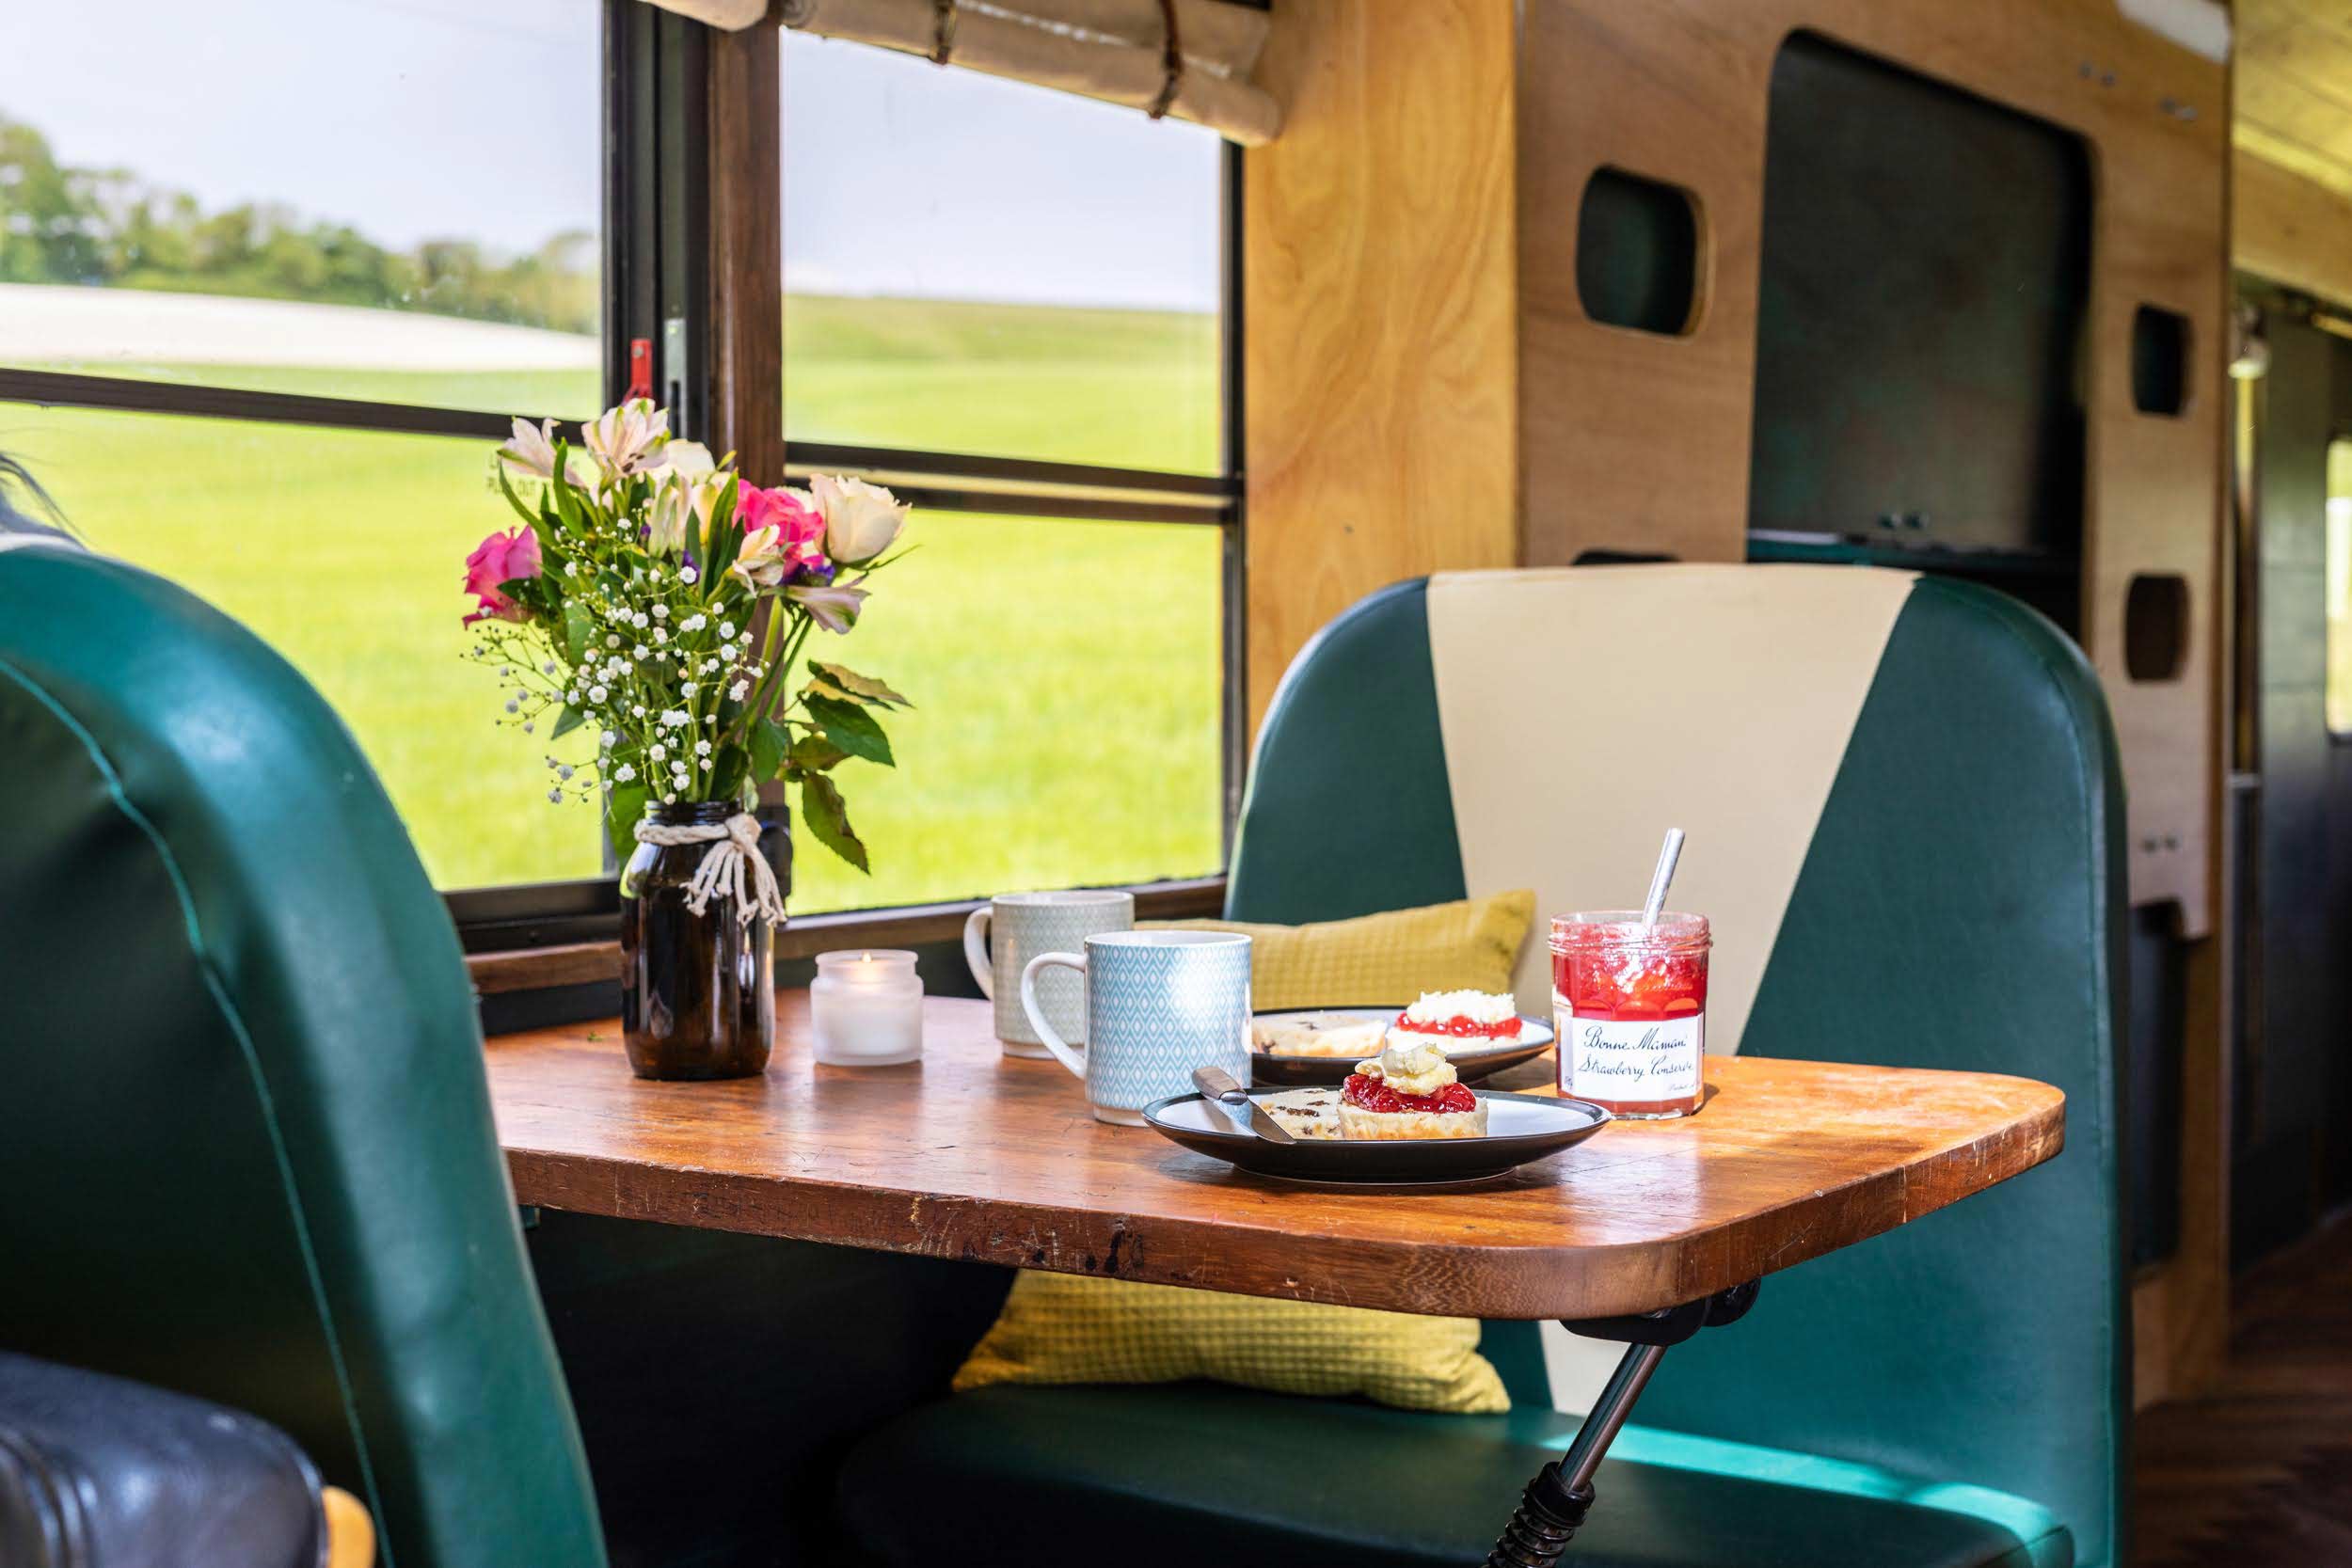
We wanted to reuse as much as we could from our bus and, with a whole bus load of seats at our disposal, it made sense to repurpose a couple and use them to create a dining area. Only problem is, those seats are wide – the aisle space on a US bus seems to be smaller than a UK bus. We decided to cut them down to 2/3 their original size, welding them together and reupholstering them in new vinyl to create our own American-diner. We found an original teak school table from the Wood Recycling Store, cleaned off the gum but left the graffiti, and used part of the disabled lift as a table leg to complete the look.

In for a penny - the epoxy kitchen countertop

Epoxy counter

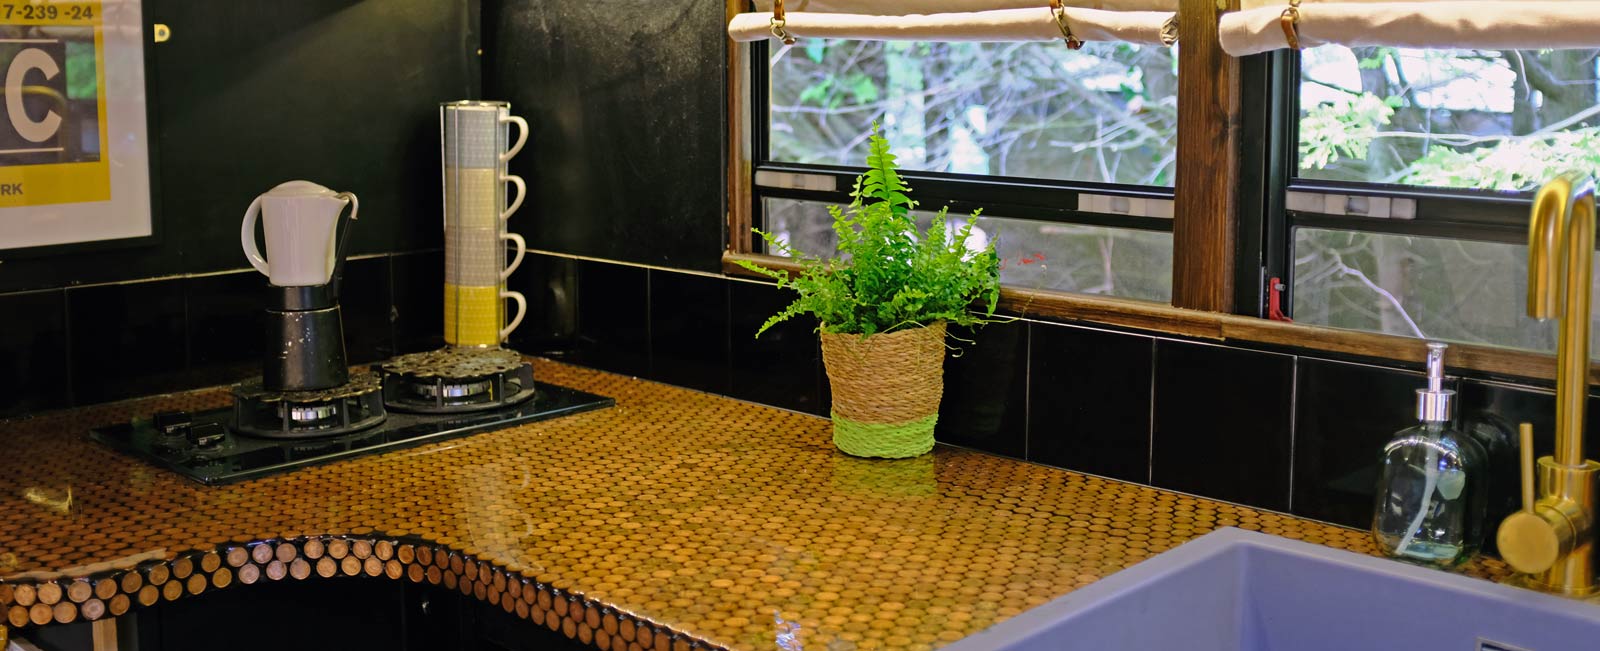
My other big ‘work from home’ project was the kitchen countertop. Whilst travelling in America, we’d helped our friends create an incredible feature shower wall with glow in the dark epoxy on pecky cypress (wood that is full of holes made by fungus… we don’t get it over in the UK, although other woods get fungus holes) and I really wanted my own epoxy project on the bus. I had in mind a river table but when I started to research it, the huge amount of epoxy you need and the seasoned live wood were prohibitively expensive. I started looking into micro-cement instead but that too was pricey. Time was running out – Neily needed to move on with the kitchen – and I was moments away from ordering a boring butcher block surface when I realised that if we did a shallow epoxy pour over an interesting surface, an epoxy countertop was do-able. Scrap the butcher block and head to the bank – I wanted pennies and lots of them!


Neily cut me the MDF base, I primed it and then set to the job of meticulously cleaning and glue-ing 3000 (ish) pennies and halfpennies to the top. Grout went on next and then it was polished. I was nervous about the epoxy pour because you only get one shot at it. You mix the epoxy and hardener to exactly the right ratio and then stir for a specific amount of time. Once you start, there is no room for error. Get your ratios wrong and it doesn’t set. Set your timer incorrectly and it gets dangerously hot. Pour it badly and you get bubbles. Cure it at the wrong temperature and it scuppers the process. Yikes. We followed the instructions to the letter! The main concern was the rolled edge – to achieve this you have to tape the edge of the countertop to form a barrier. You leave it to cure for an hour or so until it has more of a gel consistency, then remove the tape. The gel doesn’t just stream off like a liquid, so it holds its shape as it drips and eventually rolls over the edge. It was still a bit bubbly, but we chose an epoxy that degasses itself as it cures so we left it for the night. In the morning it was crystal clear and looked sooooo good. It took 24 hours to be touch dry and then a further couple of days to completely harden up. A quick sand of the now solid drips at the bottom and we were good to go. It was a week in the making, but it was worth it – it’s a triumph, even if I do say so myself!

Getting off-grid ready - solar power, compost loos and a service vehicle

Solar panels Skoolie

We wanted the bus to be off-grid. We loved that we could just travel anywhere in the U.S, we didn’t need to plug in to survive and could stay in the wilds as long as our water tank allowed us, so our UK bus needed the same features.


With the help of some fabulous friends, we were able to install 6 solar panels. We hinged each panel on to aluminium boxing with gas struts so that they can be angled to 35 degrees, which is optimum for harvesting the low English winter sun. We will be able to generate plenty of power even on wintery days. 


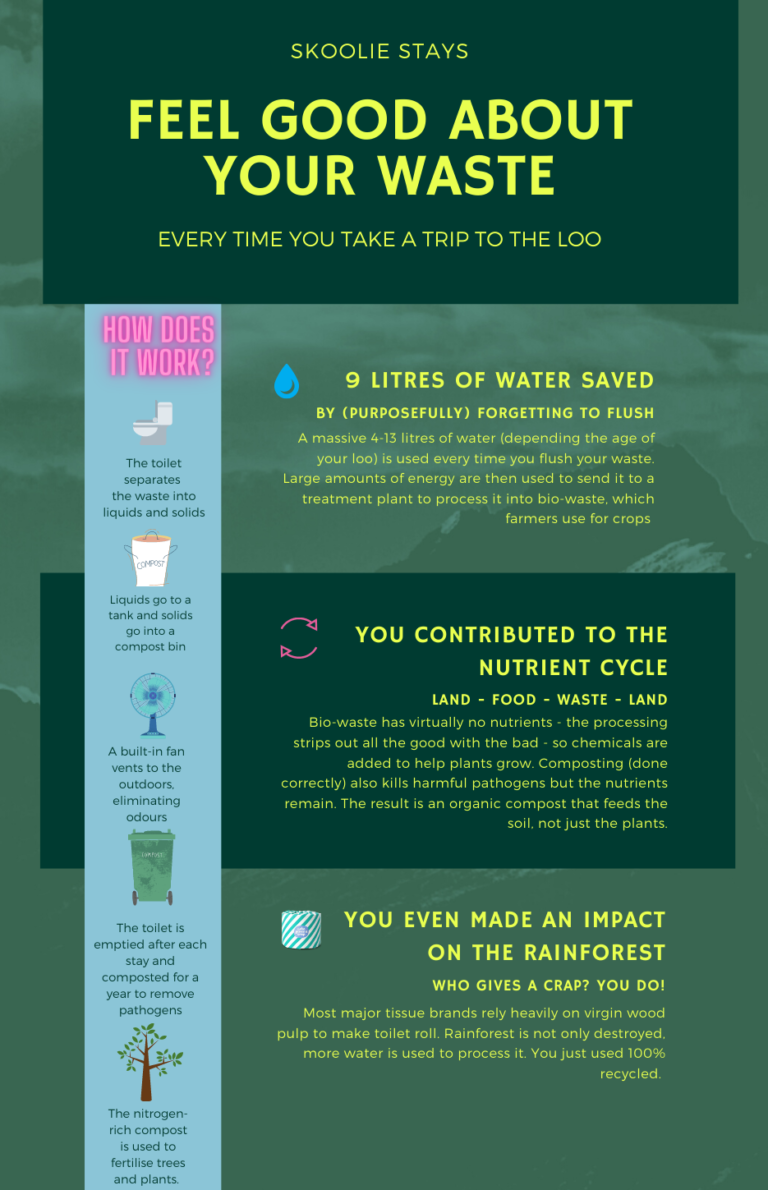
The other eco-arrival was our compost loo. We thought long and hard about this one. There was no doubt in our minds that a compost toilet made sense – it not only massively reduces water consumption, which means we wouldn’t require a black waste tank, we lived with one for a year and we know that they are brilliant devices for small spaces.


The concern was guests being grossed out with the idea of a campsite-style stinky long-drop. In the end we figured that we just had to change people’s minds by promoting the benefits, namely the enormous amount of water you are saving, and addressing the fears, the biggest one being that they smell. They don’t at all. The liquids and solids mixing together is the main culprit of the lingering smells and with a compost toilet like ours, they are separated. Guy has fitted a tank under the bus for the liquids. The solids go into a container that is vented to the outside. A scoop of sawdust to hide the evidence and a sliding lid to cover the container, and you can walk away confident of no smells.


Our toilet choice was a Simploo, a UK make. They have been really helpful and their customer service is also top notch. We are pretty sure we will win our guests round with their product.

Adding design flair with repurposed wood, upcycled metal and an evolving cool colour pallette

Painting the wooden panels

From the beginning of the build we tried to make the most of the materials around us, re-using parts of the bus as I’ve mentioned, but also upcycling things we found along the way and hunting for the perfect pieces in second-hand stores.


Gumtree, Facebook Marketplace and Ebay were my friends. Scouring through other people’s trash produced bus treasure which came with fascinating stories or brought us new followers. Our perfectly-sized Scandi leather sofa belonged to a local man who would chill out and relax on it as the tunes played from his fabulous Wurlitzer. Our retro leather pouffe came from a lady who was thrilled to find out that her beloved footstool (which didn’t fit her house) was going to move to a Skoolie. She was so inspired by our story that she went on to become one of our first bookings. 


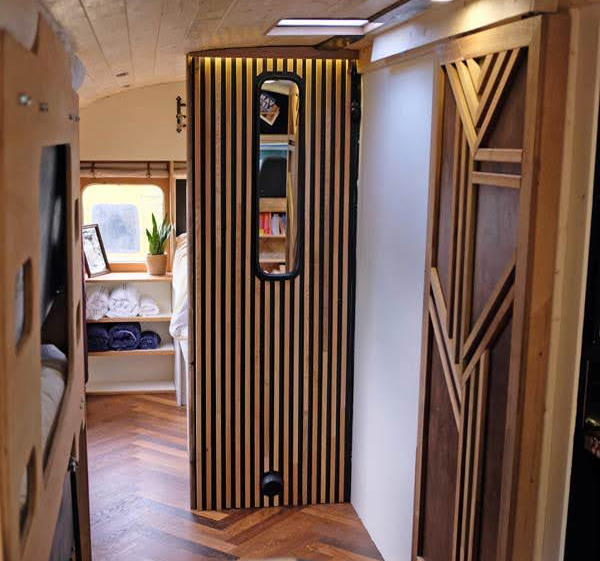
The ‘treasures’ often evolved to be something entirely different. The old doors we picked up that were too heavy for us to use, turned out to be made from American oak slats that we were able to plane down and use to frame our old bus mirror as part of a feature wall, and a kitchen cabinet. A water-damaged teak futon was dismantled and brought back to life as a sliding barn door for the bathroom. The hardwood pallets were used for framing the hatches and even our cutting table from the build was chopped up to be turned into shelves, held up by a huge bit of driftwood we found on the beach. To smooth out the cut marks, I filled in the gaps with leftover  epoxy and glow in the dark paint.


With practically everything finished, it was time to paint. Our original choice of green was developed to create a pallette that matched the wood and copper tones. We added copper and cream paints and fittings and shopped for soft furnishings in soft greys, earthy maroons and teals with the occasional accent of orange because I’d found a fabulous retro Le Creuset ‘volcano’ kettle!


I spent the evenings sewing cushion covers that would tie everything together while the boys worked on their last big project: the murphy bunks.

The murphy bunks and the king-size bed

Murphy bunks in a skoolie

In America, the boys bunks were the worst part of the Skoolie. Our son summed it up:

“They were like coffins! You could barely sit up and there was no air – they sucked”!


Considering they were only being used to sleep in, they took up an enormous amount of space. We knew we wanted to do something different with our UK bus. 


Murphy bunks fold out from the wall, which means they have a much smaller footprint. Friends of ours have ones in which the top bunk drops down to become the back of a sofa (the bottom bunk), but though we liked the design we knew we wanted to keep the sleeping area separate from the living space. 


Guy and Neily excelled themselves with the design and build. They are roomy, comfy and really easy to put up and down because they are assisted with gas struts. It makes a huge difference to the space being able to close them up when they are not in use. And, judging by the social media comments, they are loved as much as the epoxy counter!


The last thing we brought in was the king-size bed mattress and slats. Underneath the bed is the pipework, diesel heater, batteries and the water tank so this was a key working area for much of the build. It was only right at the end that we added the wooden slats and finally brought in the comfy Inofia mattress, transforming it from a work zone to something beautiful and tranquil. The slats sit on a frame so we can lift the whole bed up to access the pipework if ever we need to. 

Laying the floor and the deck

Laying the floor

All that was missing was the floor. Or should I say, a couple of square metres of floor.


Way back at the start of the build I’d sourced 10sqm of old wooden flooring that someone had bought and no longer needed. It was gorgeous engineered, top of the range, oak herringbone-style slats. The problem was, when we took it out the boxes, we only had 6sqm. Gutted…. we needed 8sqm. Would we really have to source something new?


Buying expensive items at the start of a build, when you have the time to shop around, is much easier on the wallet than at the end of a build. We had neither time or finances on our side so I thought I’d try my luck and source the supplier to see if they would help us out with the last 2sqm. I found their name on the side of one of the boxes – Havwoods – and got in touch to see if they still stocked the wood.


Joy of joys, Havwoods still had stock. And, joy of even bigger joys, they loved our Skoolie so much they agreed to sponsor the last corner of the bus so that we could have our beautiful floor without breaking our budget. They even posted up an interview with us on their site. It looks freaking awesome – the shades and patterns of the wooden planks brought together all of the angular designs and warm tones we had used throughout the build. We couldn’t have been happier with the result.


The last thing to arrive was our deck. For this, Tristan, a local lad from Firle area, stepped in to help. He was brilliant and developed the original plan to improve the layout and functionality. It is amazing to be able to walk straight out from the bedroom onto a private sun deck – better than we even imagined and the perfect way to end our build.

The finished Skoolie!

american school bus firle

We are both so proud of what we have achieved – what a journey, what a finish and what a result: we own our very own fantastic Skoolie again. 

Categories
Skoolie Stays

Visiting National Parks – educational and inspirational

U.S National Parks - educational, inspirational and perfect for Skoolie road-trips

Vast swathes of preserved land, incredible natural wonders, wildlife in abundance, amazing hikes and educational activities – if you are on a road-trip in America, you do not want to miss the National Parks.


This aspect of our trip taught us that our own UK Skoolie had to have the most beautiful surroundings to achieve true glamping heaven.

ruth wimpory skoolie stays

By Ruth

Skoolie Camping in the great outdoors

Each state runs its own beautiful parks, but there are 62 National Parks run by the U.S. National Park Service, founded in 1916, that are considered to be the crown jewels of America’s diverse landscape. They host millions of people each year and are beautifully curated and preserved so that people can have the best possible access to the natural world. 


To see all 62, you’d need to visit 29 states and two U.S. territories. That wasn’t possible for us, but we bought ourselves an America the Beautiful National Parks yearly pass for $80.00 (entrance to Yellowstone is $50 alone, so it makes sense) and crammed in as many as we possibly could.

Read our top 5 parks below: 

Yellowstone

Bison crossing in Yellowstone National Park

If National Parks are the pinnacle of America’s outdoor experiences, Yellowstone National Park is at the very tippidy top of the pile. It covers 3,472 square miles of land and has the world’s greatest concentration of geysers, mud pots, fumaroles, hot springs and the largest number of free-roaming wildlife in the lower 48 states. The Grand Loop Road that circles around inside, close to most of the major attractions, is 142 miles long and it gives you the chance to see bison, grizzly bears, eagles, moose, elk and the relatively recently reintroduced, grey wolves. 


We watched geysers shooting high into the sky, stared at bottomless turquoise pools and following winding canyons that rivalled Grand Canyon in drama. Our absolute favourite part was the Lamar Valley though. We went at dawn, winding through the herds of bison as they crossed the road in front of us and spotting grizzlies. We parked up alongside the road for a coffee and, as we climbed onto the roof-deck, we could hear the wolves howling. From our incredible vantage point we were actually able to spot two wolves hunting the bison – the surrounding cars had no idea what we were looking at. 


All that in mind, it does not take a genius to work out why people recommend booking Yellowstone in advance.  We arrived in the heart of the summer though and managed to snag two nights at one of the National Park campgrounds. We also free-camped in the Bridger-Teton Forest (to the east of neighbouring park, Grand Teton) and off the John D Rockerfeller Jr Highway (close to the south entrance). We also found a beautiful spot in the Shoshone Forest (just outside the gates to the north-east and perfect for early morning wolf-watching in the Lamar valley.  


Where we stayed

Yellowstone is incredibly popular – it had 4,020,288 visitors in 2019 – so it is worth planning ahead. If you haven’t, it is possible to do it last-minute We arrived in the heart of the summer and managed to snag two nights at Bridge Bay Campgroundone of the National Park campgrounds. We also free-camped in the Bridger-Teton Forest (to the east of neighbouring park, Grand Teton), off the John D Rockerfeller Jr Highway (close to the south entrance) and in forest land near West Yellowstone gate. Our top spot was a beautiful spot pull-in by the river in the Shoshone Forest (just outside the gates to the north-east and perfect for early morning wolf-watching in the Lamar valley.  We spent a week enjoying the park and only paid for two nights – a bargain at $26pn!

Yosemite

Yosemite National Park from the roof of our skoolie
Yosemite Valley from the roof-deck of our Skoolie

Yosemite is one of America’s most popular parks and we were expecting it to be busy and impersonal. It is absolutely stunning though – you spend most of the time in a fairly small portion – the Yosemite Valley – and everywhere you look the views are jaw-droppingly gorgeous. 


We hiked up to the top of Yosemite Falls and though there was no waterfall, it was the end of a very dry summer, the views were spectacular. Our favourite part of the park though was El Capitan. As a treat for climbing the Falls, we watched Alex Honnold’s Free Solo on the laptop and the boys became obsessed with bouldering. We spent hours watching the climbers on the rock face, tracking their slow progress with binoculars. Is that him? Maybe, just maybe…

Where we stayed

Yosemite is even more popular than Yellowstone. In 2019 it had 4,442,861 visitors. It’s much smaller – or at least Yosemite Valley is – so you need to get your campsite booked asap. There are some free / cheap options if you are in a small vehicle / tent, but in a Skoolie the closest we could get to free was a Boondockers Welcome home about an hour away.

Glacier

Top of Going to the Sun Road
Glacier was an unspoilt, pristine wilderness

Back in the UK we had never heard of Glacier. When you get to America, and specifically Montana, it’s a different story. Despite the state being three times the size of England and full of wilderness, wildlife and stunning mountain passes (check out our video of Skalkaho Pass!), every local spoke wistfully of Glacier National Park and the incredible hiking opportunities. We primed the boys and packed the treats! 


We hiked some incredible trails , taking the Trail of the Cedars through huge old Red Cedars full of deep, dark crevices, then branching (no pun intended!) off to Avalanche Lake. This gradual two-mile incline took us up through the forest past chipmunks and ground squirrels, fallen trees, moss-strewn boulders and streams – remnants of an old glacier that forged a path here. Eventually it all opened out to a circle of mountains complete with waterfalls – all of which were cascading into the stunning, turquoise Avalanche Lake. It was unbelievably picturesque and serene, despite the number of people on the same walk. 


We also took on part of the Highline Trail and Hidden Lake Overlook Trail at the top of the passThe views were spectacular, a deep blue lake flanked by steep crevices and Sperry Glacier. Further down on the other side of the park, we enjoyed St Mary Falls, then on to the slightly higher Virginia Falls. It was a beautiful, relatively quiet seven-mile return walk alongside the glacial St Mary Lake, past Baring Falls and underneath the scarred Rockies. 

Our favourite part of the week was our mega-trek. We had built the boys up to an 10-miler, and chosen Iceberg Lake as our chosen walk. We’d been learning a lot about trees through the Junior Ranger packs, and we were able to identify Lodgepole Pine through the cones and could see signs of how the forest was rejuvenating itself through its growth patterns. The view down the valley, thick with trees and with no development or people in sight, felt like one of the wildest places we had been and when we arrived at the glacial lake in the mountains, we heard the crunch and creak of cracking ice and watched a huge chunk break free from the face. Incredible.


Where we stayed


You cannot drive anything over 21ft over the Going to the Sun road, the only route through the park, so the most obvious thing to do is camp at Apgar or St Mary’s Visitor Centres in West Glacier or St Mary’s respectively.  From here, Glacier National Park offer a free shuttle – it’s a killer of a queue waiting for it, but it does mean you can explore the park. We also stayed at Many Glacier campsite, which was much busier. Get there early and be prepared to queue for vacating spots. 

Big Bend

Big Bend National Park, Texas

Big Bend is a wondrous place. It’s difficult to get to – well it takes a long time (everywhere in Texas takes a long time!), but it was well worth the trip. It is the only National Park that contains an entire Mountain Range – the Chisos. Unfortunately you can’t drive big vehicles into the campsites at the base of the Chisos so we had to rethink our week of big views and tired hiking legs. Instead we headed to the Rio Grande


It was magnificent. We had glorious sunshine and and the Sierra del Carmen literally glowed at sunset. We had some gorgeous walks from the campsite to the Hot Springs, where you can soak in the water before walking back along the river to camp. There was also a nature walk that jutted out onto a pinnacle. Surrounded by the curve of the river, Mexico just a stones throw away, it was a wonderful place to watch some of the hundreds of variety of birds, including the bobbing heads of road-runners as they pelted ahead of us; listen to the bells around the necks of the Mexican donkeys as the grazed on the river bank and laugh at the turtles as they plopped off branches into the river. 


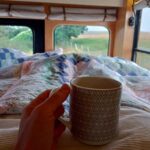
Our favourite part? As I was lying in bed one morning drinking my tea, a coyote wandered past. A coyote! I called the boys, partly so they could also see this elusive creature but a little bit because I had no idea where they were and wasn’t entirely sure that small boys weren’t coyote fodder!

Where we stayed

We stayed in the Rio Grande campsite in the south of the park. Originally disappointed because we had wanted to be in the heart of the Chisos (and you can’t take large vehicles down the road leading to the base), it actually turned out to be an incredible spot. There was lots to do there and the scenery was stunning – all the beauty of the riverside with the Chisos as a backdrop. 

Banff National Park

Emerald Lake in Fall
Caption

The Canadian Rockies had long been on my list of places to visit. Right at the top was the Icefields Parkway, part of Banff and Jasper National Parks, which runs from Lake Louise to Jasper. The Icefields Parkway is one of the ‘must-do’ things in Canada in a Skoolie (according to every list ever written!) and we were not disappointed. We were on the cusp of Autumn and as we drove the Icefields Parkway the leaves were changing to a beautiful array of reds and golds. The road is beautiful but it is long – it takes a good few hours to drive it – so we broke it up with a hike above the Athabasca glacier, stopped for two nights so that we could visit Maligne Canyon, then, on our return, stopped at Sunwapta and Athabasca Falls. 


The highlight of the Canadian parks was Lake Louise in Banff National Park. Of all the places we visited, this spot was the most touristy but it really is spectacular. We lucked out with a glorious, sunny day and the impossibly turquoise-blue water was shimmering, the mountains surrounding them were golden with autumnal larch trees and the snow capped peaks were a stark white against the blue skies. We escaped the crowds by heading past the beach at the far end of the Lake and following the valley up to the Plain of Six Glaciers tea house. From there it was a steep-ish trail to view the Plain of Six Glaciers themselves, then on to the Highline trail and the Little Beehive trail. We had phenomenal views over Lake Louise’s cloudy, glacial, turquoise water on one side and Emerald Lake on the other,  a sharp contrast with it’s clear green water. We hiked down the switchbacks and had tea in Lake Agnes tea house before climbing down to Lake Louise, sun-kissed, wind-swept and ready for a Canadian beer!

Where we stayed

We stayed in Tunnel Mountain Campground in Banff, which was fab. We actually hired a car to do the Parkway because we had guests with us and wanted to make sure we could park, so we left the Skoolie there for a couple of days. Back at Lake Louise, reunited with the bus (oh how we missed it!), we stayed cheaply at the overflow parking site – it worked perfectly as there was a shuttle that took us straight past the car park queues, right to the lake itself.

Categories
Skoolie Stays

Camping in a Skoolie in America​

Camping in a Skoolie in America

How easy is it to get around in a 37ft school bus and where do you sleep? We have all the answers!


This is where it began – the change of scene that we all need now and again. 

ruth wimpory skoolie stays

By Ruth

The beautiful part about living in a Skoolie is that your home comes with you, whatever the destination. We left Utah, snaking our way up past Bear Lake and into Idaho, before crossing the border into Wyoming for our first National Parks: Yellowstone and the lesser-known, Grand Teton. Throughout this first month of our travels, we learnt about the wide range of options for those living in a home on wheels and what worked for us and our bus. 

Life on the road

We may have been sleeping in campgrounds but we were sleeping in relative luxury. Living in a Skoolie is not like traditional camping – we didn’t have to store our food in a coolbox full of melted ice or sleep on slowly deflating airbeds for a start! Our bus-home had everything we might need for a comfortable life: a hot shower, toilet, fridge freezer, cooker, comfortable beds. Of course all that takes up space. We measured in at 37ft plus few extra feet for our bike rack. So how easy was it to get around?


Americans truly love the road. In the UK, if a drive is longer than a couple of hours we start to wonder whether it is worth the effort. Three or four hours and we have to wait for a bank holiday weekend – we need to ‘recover from the journey’. It is completely different in America – there is nothing they like more than a road-trip.  In Yellowstone, we met campers who had travelled 10 hours in their truck, with two kids under 10, to camp for the weekend.  

They may like the road but they also like their space and comfort. As we drove through Utah, Idaho and Wyoming we passed numerous 40ft motorhomes, often towing a car or a boat, as well as a plethora of gigantic trailers (caravans) attached to huge, 6-seater pick-ups. Many of them had slide-outs too (weird little boxes that emerge from the side of their RV like some kind of growth) to make the living space bigger. Our 37ft skoolie looked small in comparison and size was never an issue as we navigated our way north.

Campsite camping in a Skoolie

Skoolie at a state campsite
In National Parks, there are less options. If you want to stay in the park, you have to stay in a National Park campsite. These are usually the most basic - just a toilet, with a waste and water station. Unfortunately those that perfer amenities tend to resort to generators, which can make the sites a bit noisy.

We budgeted our trip based on staying at proper campsites with all the amenities but campsites in America really varied in cost and facilities. You could be looking at anything from $7 to $100+ a night depending on where you are and what type of campsite you choose.


As a rule, campsites run by the state, national parks, US Forest Service and BLM (Bureau of Land Management) are much cheaper and in more rural locations but often come with more basic facilities – They may not have power or they might not have a shower block.  they invariably have terrible mobile phone coverage. The privately owned campsites are more like holiday homes and have big sites with plug in electricity and water, waste dumps, play areas, laundry, little shops etc – but they often felt a bit big and impersonal. Lots of people live in RVs in America and it felt like many were just holed up in their front rooms watching cable television. 


Because we could live off-grid and wanted to explore the outdoors, we quickly realised that we preferred more basic camping, but that’s not a choice for everyone. If you do prefer to have all your amenities close at hand, you can show allegiance to a particular chain and sign up to get a discount. The Thousand Trails Pass, for instance, breaks America up into different zones and you can pay for individual or multiple zones. Coast to Coast do something similar as I’m sure do others. If $800 sounds like more than you can afford, you can just join a membership scheme like KOA (campsites of America) or The Good Sam Club– you sign up for their card and get a small discount off each stay. 

Basic camping in a Skoolie

Beautiful camp spots
This stunning site cost us all of $7 in an honesty box

State camping options vary according to each State. In Montana, as well as other more remote places on the west coast and in the desert, we had no facilities other than a long drop toilet, but they rarely cost us more than $10- $15 a night. On the west coast in Oregon, Washington and California, the state sites were on the beach and had lovely shower blocks etc. They were often closer to $50 a night. 


The state camping sites are lovely and you are more likely to find people properly camping in tents or little trailers, enjoying the great outdoors. People were incredibly friendly and accommodating – they were all thoroughly interested in our journey and the experience. They loved the Skoolie and usually went bananas when we told them we were English!

Free Skoolie camping: Dispersed sites

Wilderness camping spots for free
Sites like these are completely free

If you don’t want to spend any money on accommodation at all, that is possible in America. If you don’t mind driving a little further down the track into the National Forests or to reach BLM land, there are free places to camp – ‘dispersed sites’ (not ‘depressed’ as one person with some helpful advice for us remembered them!). These are rarely more than just a space to camp (although sometimes you get a long-drop), so you need to be self-sufficient, but if all you want is a parking spot and nature, you are on to a winner. They are not even that far from the action; we visited Grand Teton NP and Yellowstone in high summer and stayed in neighbouring forest land for free most nights. It took us just 20 minutes to bump our way back down the track and get back into the park.


You can find all the cheap / free campsites by searching on Campendium or Wikicamps. We loved the dispersed sites, not just because of the price tag (or lack of), but because they were always a surprise. You read the briefest of details about them and then throw the dice – most of them involve a tense journey up an unpaved road. Will the bus do it? Would we be able to turn around? Were we going to fall off the edge of a cliff?! Then you round the corner and discover the most incredible view, the money shot. It adds a whole new dimension to the experience; we had a view over Grand Teton at sunset from our roofdeck (a celebratory beer) that was better than any paid-for boat-trip or mass-attended boardwalk hike. It was awe-inspiring.

Free Skoolie camping: Boondocking

Harvest host at distillery
Our quest to sample local produce saw us drinking potato vodka in Idaho, eating cheese in Oregon, trying lavender oil in Washington, eating sourdough and pickles in South Carolina, drinking wine in California and whisky in Tennessee.

There are other ways to keep it cheap and meet nice people. Americans are much more open to the idea of people camping than the Brits are. There are various truck stops and Walmarts that let you sleep in their parking lot, as well as official schemes that help to hook you up with people willing to offer you space on their land. We had several great experiences using Boondockers Welcome, staying with a lady in Montana who showed us how to bake bread, a Texan who let us pick fresh fruit and veg from his veg patch and gave us some of the deer shot last year (well, we were in America!) and many more. 


We also signed up to Harvest Hosts. This was a bit more expensive – about $70 – but it gave us details of wineries, breweries etc that were happy to put up RVs. It’s proper to buy a bottle or do the tour, but you benefit from that anyway. For a family with kids, this was often the best way for us to sample the local wares – parking in a city to go to a restaurant was not an option, our bus was to big and our budget too small. It turned into a real highlight of our trip. America does have foodies after all!

camping with goats
We had some friendly neighbours at the Goat farm in Tallahasee

We also used Hipcamp, which often meant paying a little to stay on someone’s land, but that was a good option too. We found ourselves volunteering on a goat farm in Florida and a pig farm in Georgia that gave us and the kids the kind of opportunity you just wouldn’t find at the regular campsites. 


Categories
Skoolie Stays

Our year in an American school-bus

A year in a Skoolie

Finally, after months of planning, we flew out to Utah in the United States to begin our year-long adventure travelling in a converted school bus – a Skoolie

ruth wimpory skoolie stays

By Ruth

The start of the adventure - summer 2019

When we started planning our trip on a map in our UK living room, we had a route that spiralled through the Lonely Planet highlights of America, weaving our way through Alberta, B.C and the Yukon, eventually reaching Alaska. I wanted bears, Orca and wild salmon leaping. I wanted to camp out in the Denali Park wilderness under the Northern lights   – it looked incredible. We soon realised though, incredible did not mean realistic. Our trip was entirely dictated by two things: where our builder lived and when the kids broke up from school. That meant flying into Salt Lake City, home to our builder, in mid-July 2019, with temperatures in excess of 100 degrees Fahrenheit.  


Alaska has a narrow summer window – we simply wouldn’t make it – and there was no way we could travel south in such intense heat, which struck off many of the National Parks that America is famous for: Grand Canyon, Bryce Canyon, Zion, Moab… it was a sharp blow. But then we realised, it actually took the pressure off and gave us freedom. Travelling in a home on wheels to places you know very little about meant we could meander wherever we wanted, follow the good weather and stay as long as we liked. We ended up having a unique and incredible adventure – a real road-trip into the unknown.

Picking up our American school bus

We picked up our bus two days after we arrived in America.  Our builder did not send us many photos of the progress because he was so busy, so although we had seen the layout on paper and had seen some of the wooden structures for the sofa, kitchen and bunks, we had no idea what it looked like. It was so strange to step into the space and see it for real. 

Mirrors are your friend

Skoolie driver
Guy had to learn how to drive the bus fast - one loop around a car park to practice and we were on our way!

It’s pretty scary hitting the road in a 38ft, 14 tonne vehicle. You have to have a special HGV license to drive something of that size in the UK but in America, once the bus is registered as a personal vehicle, you can drive it with your standard license. Taking his family out on the road was the bit that Guy was anxious about. Our builder had given him a quick lesson the day before in a parking lot – “rely on your mirrors to see where you are” –  and he’d watched a few You Tube videos (I kid you not!) about ‘squaring corners’, but that first journey was a test of his nerves. He nailed it though and we were on the road, just the 4 of us, ready to go camp America style. 

Utah, Idaho & Wyoming

We spent a glorious two weeks soaking up the sun in the slightly cooler northern Utah, making the most of the National Forest campsites, finding our way with the Skoolie and learning its (and our) travelling quirks. When you live a self-sufficient life you need to get used to relying on solar (not a problem in a Utah summer), composting toilets (also, amazingly, a simple smell-free solution) and reduced water (more problematic as we didn’t know where to refill!). 

Our route towards Yellowstone dipped into Idaho, where we kick-started our Harvest Host’s membership (a scheme that gives Skoolies and other RV’s the chance to camp for free and try the produce at small farms, distilleries, breweries, vineyards etc.


After some debate at the distillery bar about how steep the passes into Yellowstone were, we opted for a longer drive through Wyoming that took in more of the incredible scenery. It allowed us to approach Grand Teton and Yellowstone from Jackson Hole in the south. 

We spent a week in the Grand Teton National Park and Yellowstone National Park. You can read more about this trip, as well as how we managed it on our budget, here.

Montana

Montana is so heavily wooded that fires are the norm during summer. They ravage the landscape, affect visibility and leave a smoky smell everywhere. Happily for us, Montana was having an unusual weather year  – a wet spring kept temperatures cooler and Montana’s summer was hot, clear, lush and fresh. Many people told us we were experiencing it at its best and they were right, it was a total joy to travel and camp. 


Living in a Skoolie gave us the freedom to enjoy Montana – we spent a month fishing, hiking and kayaking, we bought bikes and explored further afield, we spent a week hiking in Glacier National Park, one of our favourites, and got dangerously close to grizzly bears.  It was the perfect way to settle into Skoolie life. This was no longer a holiday, it was a way of life.  

Alberta & Vancouver

The Canadian Rockies had long been on my list of places to visit. Right at the top was the Icefields Parkway, part of Banff and Jasper National Parks, which runs from Lake Louise to Jasper. It is is one of the ‘must-do’ things in Canada in a Skoolie (according to every list ever written!), full of epic scenery, amazing hikes and wildlife galore.

We arrived in autumn (or fall!) and the weather was getting chilly. Just like Montana though, we lucked out – we had gorgeous sunshine for much of the time and could fully enjoy the reds, golds, yellows and greens of the autumnal forests set against the turquoise glacial lakes. It was stunning.


Our route took us from Lake Louise to Vancouver (yay, city fun with old friends!), then on to Vancouver Island and Pacific Rim Nature Reserve. This must have been one of my favourite sites – right in the heart of the old forest, surrounded by  Douglas Firs and Red Cedars. The forest floor was densely packed with fallen logs, ferns and fungi, tiny creatures and earthy smells. I loved it. To make it even better, a short path led to a huge beach – miles of crashing waves and yellow sand covered with twisted driftwood and long ropes of seaweed. 


You can read more about the hikes we took and the places we explored in our travel blog. You can also read about how we fared with visitors – in Canada, four became six for three weeks.


Washington & Oregon

After a month in Canada, cold weather nipping at our heels, we felt ready for a new chapter of our travels. Our plan, guided by a need for sunshine, was to scoot down south as quickly as we could, leaving the forests and mountains behind. Night drives down Highway 5 beckoned – one long freeway that would take us from Vancouver through to Southern California. But then, as is always the case, we looked at the map and doubt entered our mind. What about Washington and Oregon? Rain-forests and Redwoods, wild seas and sprawling beaches, how could we miss all that? Should we continue to gamble with the weather and take it a little slower?


Of course we did! And it was well worth the wild weather we experienced. After a hairy drive / slide over black ice on a mountain pass and freezing, snowy nights at Olympic National Park, we took on the coastline. We joined the infamous Highway 101 south of Aberdeen and followed it south, crossing into Oregon at Astoria. The coastline was rugged and impressive – huge spurting blowholes, cliffs and miles of golden sand dunes backed by thick forest. 


Read more about our Washington and Oregon trip (and how we incorporated home-skooling into our adventure) here.

California

We envisaged our route through the Golden State as a string of sunny beaches and glitzy cities full of beautiful people (as well as a fair amount of  suburban sprawl and 14-lane highways!).  It ended up as a trip through towering Redwoods, autumnal vineyards, sun-scorched gold-panning towns, breath-taking National Parks and barren plains filled with spiky cactus and dust clouds. We didn’t go near the cities and we barely saw the beaches – the California fires had taken hold and we had to go inland. 


We found a side to California I was barely aware of. Small gold-panning towns and stunning vineyards, incredible Halloween extravaganzas, cheesy neon diners , huge slot canyons and more critters than you could dream of. We somehow managed to sneak into Yosemite before the fires closed it off and had three idyllic days searching for Alex Honnold on El Capitan through our binoculars, and even made it to Joshua Tree National Park for cactus and bouldering fun. 


Read about how, six months in, we felt we had adapted to life in a Skoolie in California.

Arizona and New Mexico

Suddenly, instead of heading south along the western length of America, we were headed east. Looming in the distance was the Rockies – a literal hump that represented a much bigger marker, the half-way hump of our trip. 


Nowhere does empty roads quite like the American desert. It was a long drive of nothingness; mile upon mile of scrubby land and windswept bits of tumbleweed. We were relieved to see our first Saguaro cactus and the colourful lights of Tucson. After weeks of barren desert, everything sandy yellow or spiky green, the landscape suddenly shifted into a state of colour and life. As we reached the Mexico and New Mexico border there were even a few bodies of water – Patagonia Lakes and Whitewater Draw – a Mecca to migrating birdlife. Crested birds of different colours swooped above us; herons fished alongside our bus and owls called out at night. We got up at dawn to watch thousands of cranes take to the skies, squawking and croaking like a group of cranky pterodactyls.


The boys discovered a love of caves in Arizona’s Kartchner Caverns so we took them to Carlsbad Caverns National Park. They said it was the best thing they had done in America – this was closely matched by White Sands National Park– where you can sled down the pure white gypsum dunes.


Read more about our quest to find friendship and fun in the desert here

Texas

We knew it would take us an age to cross Texas in a Skoolie but over the course of the journey we’d leave the desert behind and find the Gulf Coast and the Deep South as well as music, art, fresh produce and delicious Tex-Mex food.


The first Texan treat for us was Big Bend National Park – every moment brought us something new to look at – from the funny bobbing heads of the road runners on the campsite to the tinkling bells around the donkey’s neck on the nearby Mexican shore. Turtles swam in the rivers and at dusk the Sierra del Carmen literally glowed. 


Texas continued to reveal its treasures: we biked on the deserted shores of Padre Island; fished from the rooftop at sunset on Goose Island pier, watched the heavy flying-boat-shaped pelicans skim the waves as they touched down at Magnolia Beach and spotted alligators lurking in the shallows amongst the ibis and egrets at Brazos Bend.


Louisiana, Mississippi and Alabama

The Deep South. The words conjure up an array of images, each promising a very different picture of America to that which we have experienced so far. We were entering Louisiana, Mississippi and Alabama, each state a centre for the chequered history surrounding slavery, war and poverty, but also a heartland for the music, food and Southern way of life that charms travellers from around the globe. It offered a completely different element to our road-trip.


We visited a plantation, making sure to go to one that recognised slavery rather than the many that focus more on mint juleps and hoop skirts. We also managed to find somewhere to stay in New Orleans the weekend before Mardi Gras. We watched the parades, caught the beads and soaked up the street life of one of the coolest cities in America. 


 Read more about trip in the deep south here

Florida

What do you think of when I write the words Florida? Sandy beaches, glorious sunshine,  Disney? It’s the perfect holiday destination…. well until you realise that every other RV traveller and European winter escapee has that same image of themselves sipping cocktails at the sunset beach bar, watching rockets launch from Cape Canaveral, taking day trips into the mangroves to spot alligators and swimming with manatees in the fresh water springs.

Florida was full. Every campsite we tried was rammed, every activity was booked up and we spent every evening poring over road maps and trip planner books to try and find the best solution. How on earth would we ‘do Florida’? The answer was to do it in the way we had done every other state – on our own agenda.


We had three incredible weeks enjoying the beaches on the panhandle,  touring Harry Potter World at Universal Studios and kayaking in the mangroves and springs with manatees and alligators. Our wiggly route also saw us volunteering at a goat farm and joining a crowd of locals across the water from NASA to watch a night-time rocket launch. Florida ended up being one of our favourite destinations. 


Enthuse with us over Florida at our travel blog.

Georgia

We arrived in Georgia at the same time the news arrived that the UK had gone into COVID-19 lockdown. America was not far behind, so we took refuge with a group of Skoolies at the Skoolie Homestead Community. We expected to stay a week or two but the healthcare crisis in America, coupled with our travel insurance company refusing to cover anything pandemic-related, we ended up there for two months. 


The Homestead was the perfect place for us to experience a lockdown. Although it was hot, humid and full of gnats and mozzies, it had a brilliant communal area and lovely people, all of who had chosen too live a bus-life. This was the first time we’d really met other Skoolie families and there were several of them within the same field. There were other kids to play with and space to run around,  people played music and chatted, offering Skoolie advice and stories. We had found the community we had been looking for for months and it was here that we started to hatch our plan – could we take our bus back to the UK? 


Read more about how Covid-19 affected our Skoolie road-trip and the amazing Skoolie community here

Tennessee North and South Carolina

We were hesitant about leaving the Skoolie Homestead when Covid-19 was still a threat, but we only had one month left of our year-long adventure. The delay in Georgia had already meant that we would fail to do the east coast in its entirety, but we still had time for a trip to the Smokies. It had to be done. Besides, what better way to isolate than keeping to yourself in a bus in wide open spaces.  


The campsites started to open up so we took that as our sign and headed through South Carolina into the mountains, stopping at several Harvest Hosts breweries and distilleries along the way, which helped us learn more about how the virus was affecting small producers. The Black Lives Matters debate was also raging across the cities in America and, though we saw very little of it in the rural parks, it was fascinating to see how suburban and rural Americans responded to the crisis. 


We finished our trip off with a visit to Charleston and Savannah. We were meant to be in New York for 4th July celebrations. Instead we parked opposite downtown Savannah, across the river, listened to jazz music floating across the water and toasted our incredible trip. 


Read more about how we found the Black Lives Matter debate in rural areas of the deep south. 

Completing our tour of America
Categories
Skoolie Stays

How to buy and convert a US school bus from the UK

How to buy an American school bus from the UK

Whether you want to travel the States in a Skoolie or convert one in the UK – we have done the lot and have all the info to share!

ruth wimpory skoolie stays

By Ruth

Go for the dream, stay for the adventure!

Buying anything remotely is a challenge but when it comes to buying a US school bus – a vehicle you know nothing about – in a country in which you are not based, it’s an even bigger mission.


Thankfully, there are tried and tested routes to fulfilling your dream. Read on for our advice, what we learned along the way and a few specifics you may find useful. 

Stay before you buy? We can help!

When your ideas are getting serious, why not come and stay with us? Spend a couple of days and nights on our Skoolie Stay. Check that head-height, get a real idea of how solid it is…and how big. Big enough? Sit and think about layouts, why not bring a measuring tape! Get in the drivers seat and try it out for size. Can you really imagine driving one?  Pick up the books on the bookshelf about Skoolie builds and our own project and meditate on your future adventure. Does you other half need persuading? Here’s a surprise weekend away that’ll help! Get in touch now and we’ll help you out with this and a friendly chat about your own school bus buying ideas. Or just check prices and book now, and give us a shout when you are ready.  – Guy & Ruth

OK, read on about how to buy your own ‘Skoolie’!

Converted bus hotel
bus glamping west sussex

An economical purchase?

American skoolie
Our first American Skoolie - found in Idaho. We wanted a bus that could cope with the Rockies!

American school buses are comparatively cheap. Once they reach around 140,000 miles, they have to be retired. That means there are a surplus of decent buses waiting for private sale. 


A good solid bus with a decent service history was around $5k in 2018. That went up to approximately $6500 when we bought our second in 2020. Of course the pandemic had hit by then, which skewed prices, but converting school buses is becoming more popular and where there is demand, increased prices always follow. 


It’s worth noting that you can get them far cheaper than this (or more expensive). We were quite specific about what type of bus we wanted (a dog-nose rather than a flatnose), size (full-size rather than a shorty) and what kind of engine and transmission (an International) and also the location of our purchase (east-coast buses = rusty bottoms!).  


Of course you should also remember that this price tag only buys you a bus. Shipping it over to the UK, if that is your plan, costs far, far more than the bus itself. And whichever country you decide to convert it, you only need the shell of the bus and it’s engine. The cost of turning it a bus into a tiny home is where the money goes. Of course the snazzier you make it, the more it costs, but even a basic conversion requires a solid budget (with contingency!)

See us and other American School buses on Loveproperty.com

Finding a bus

buy a us school bus to convert
Up for a challenge?

The big problem for a UK citizen is finding your trusty steed. Buses are listed everywhere – from private sellers on craigslist to dealers to auction houses. The problem is, how do you know if you are purchasing a solid, reliable, rust-free bus? In many cases, you won’t know until you start your actual conversion, but you should do your best to check in advance. It seems a shame to waste all that money on a total rust bucket! 


Of course checking out buses in America is not easy. We had a friend in New York who was happy to help, but if we’d ended up purchasing from a dealer on the west coast, that would have been a good 5 – 6 hour flight for him to go and give it a once over. That’s like flying from the UK to Egypt! The only way around this is to find a local mechanic and pay them to look at the bus. Finding one can be a challenge, and mechanics are pricey, but it might be the only way you know for sure what state the bus is in. 

What are you buying a bus for?

American bus near Storrington
Our second bus in the beautiful Sussex landscape - a long way from its American roots in Florida

Are you buying a bus to travel the States or are you thinking of bringing one back to the UK. We’ve done both. In fact we even looked at buying one, bringing it to the UK to convert and then shipping it back to travel. That probably strikes you as foolhardy, but at one point it looked like the cheapest way to do it.  


Let’s cover all options…


Bringing an American school bus to the UK

Skoolie with seats
Our second bus when it arrived

First things first. Make sure it is a regular, retired bus that you buy – not a part-converted / fully-converted Skoolie. It makes things far more straightforward when it comes to shipping and then titling in the UK. And don’t be tempted to rip out the seats etc in the U.S – it needs to look like a bus when it arrives in the UK or you get into all sorts of MOT problems. 


Once you have bought your bus, you will need to get on and organise shipping asap. You can’t do this in advance as you need the information on the Title Deeds of the bus for the shipping agent. The agent will require lots of information about weight, height, make etc and it has to be precise. Full-size buses are too big for containers, so you will need a RoRo ferry (roll on roll off). You pay for the space you take up and so you want to make sure you get those stats right. 

Although there were lots of forms to fill in, it was fairly straightforward. In 2020, it cost us approximately £4800 with duty (16% of the combined value and shipping costs) and VAT (20% of the combined vehicle value, shipping and duty costs) on top of that. 


Space to store a Skoolie and a TWIC to your name

Skoolie Home at the Skoolie Homestead
We had friends who could help us out

The most complicated part of the process was what happened with the bus in the window between the purchase and its scheduled arrival time at the port for shipping. It takes a while to get your slot booked for the RoRo ferry and so you need someone / somewhere to collect your bus and store it for you. You will also need someone with Transportation Worker Identification Credential (TWIC)  to deliver your bus at an allotted, very specific, time. The TWIC is required by federal law for any workers that need access
to secure or restricted areas of maritime facilities and is administered by the U.S. Transportation Security Administration (TSA) and the U.S. Coast Guard. 


Luckily, our year out led to us meeting amazing friends, which meant we had bus buddies who could help us out. Our bus arrived in the UK in early February 2021 and you can read more about the process of building it, here

Where to buy a bus if you want to travel the States

Skoolie.net screenshot

But what if you want to travel in America with your Skoolie like us? Your options are a bit greater:

  1. Purchase a second-hand conversion in the US that is already titled as a RV.
  2. Buy a US school bus, convert it yourself and get it re-titled as a RV.
  3. Buy a US school bus, get someone to part convert it and do the rest yourself.
  4. Buy a US school bus and get someone else to convert it completely, then re-title it when you arrive.
  5. Buy a US school bus and ship it to the UK to convert, title it as a motorhome with the DVLA, then ship it back to the US.

Building on somebody else's dream

Skoolie interior
We sold our first skoolie with everything in it - the dream is now someone elses

The cheapest option is to buy an already converted Skoolie. These pop up all over the place – eBay, Craigslists, local listings sites – and they can be just a few thousand dollars. Of course the down side is that there is absolutely no way of knowing what state they are in if you can’t look at them yourself. It could have mechanical issues or massive rust problems – there are millions of things that could be an issue.


The other problem is timing. If you buy something on an auction site, most people expect pick up within a week or so. That didn’t work for us as it meant leaving all our travel plans to the last minute. Giving up our house, school and jobs felt risky enough. Turning up in America without a home and no idea of where we would find one, that was far more than we happy to sign up for. 

Do it in the U.S yourself

The DIY route is the most economical option – no-body will put as many hours in or work as cheaply for you as you will for yourself! We’d read several blogs by people who had spent as little as $10-12,000 for what looked like a gorgeous home and we were keen to get stuck in on a bigger project. 


You also have to remember that those blog prices are from people who have spent months, if not years doing up their buses. They would have had access to tools as well as the ability to purchase / pick up bits and bobs as they went along. They undoubtedly had pals with mechanical knowledge or an uncle who was a dab hand at cabinet making. Crucially, they had space to store a 40ft vehicle. 


If, like us, you have no contacts, no space, no tools and absolutely no clue how to convert a school bus, you are going to have to factor in a helping hand.

A helpful hand on helpful land

Colorado Custom Coachworks

Luckily there is an option for people who do not have their own land or tools.  There are several places that lease space and tools for school bus conversions. Colorado Custom Coachworks, were the big name in 2018, charging 1050/mnth for space to work on a full size bus (2018 prices). That seemed do-able, until we spoke to them and realised how little we knew about conversions and how much help we would need to do the ‘rough in’ – the demolition, electrics, plumbing etc. Prices went from do-able to astronomical. 


We shopped around, mailing and calling Blue ridge conversionsSkoolie.comChrome Yellow Bus, Skoolie Homes and Paved to Pines (in Canada) to get costs. Everyone was really helpful but prices were comparable to Colorado – to buy a bus and get the ‘rough in’ done, we were looking at $40k plus. We’d also have to spend a decent chunk of time working on it, which was also going to massively eat into our year-long visa. 

Paying for a conversion

All of the companies that offer part-builds, all do full builds as well. They regularly top $60k (2018 prices). Some are a little cheaper – offering standard ‘flat-pack’ type fits with optional upgrades. By the time you add on all of the options you want to make it unique, you are back up at the $60k mark.


I did warn you that the cost was in the conversion!

The British option

RoRo ferry
The RoRo ferry is the only way to bring a full size bus over

We were musing about how American labour costs seemed higher than the UK, and how it would be so much cheaper and easier to do it in the UK, when we realised that there was nothing stopping us exploring that option too. 


We spoke to specialists in the UK and yes, it was cheaper. The bus would be too big for a shipping container, so the only option was RoRo (roll on roll off) for approximately $5000 a journey, with a discount if we did three journeys. Tax would be on top of that. But what was the tax implication? That was when I entered into the dark world of tax and shipping.


After many long discussions with HMRC, it turned out we would be eligible for I.P tax relief on the shipment over if we were returning it within 6 months.  I couldn’t speak to U.S Border and Customs about the second shipment back, they were not taking any calls, but their website suggested returning an American vehicle back to the U.S would also be tax free. Then, for the third shipment back to the UK, HMRC confirmed we might be eligible for Transfer of Residence because we would have owned the vehicle for over a year. Winner, winner, tax-free dinner!


Or not. USBC was taking emails and they quickly confirmed that there were significant hurdles to this plan. if a vehicle is owned by a UK citizen, it doesn’t matter if you are sending it back to the country in which it was bought. Effectively it is now a UK vehicle and although it is US made, the bus would have to meet all applicable FMVSS and EPA emissions standards. You have to produce an EPA form, which is near impossible if you do not have insurance and you can’t get that if your license does not allow you to drive a passenger bus.  You can’t even get anyone else to drive it as only the IOR (Importer of Record) is allowed to do that.  It would have to arrive as a motorhome, which would mean retitling in the UK where it is notoriously tricky (we cover that in our UK build blogs).  


And, even if we could get a license for a passenger bus, to really twist the knife, the IOR is only permitted entry on a carnet. The carnet limits movement around North America (i.e it is not valid in Mexico) and restricts travel to 1 year.


Finding an American builder

Friends on a Skoolie
Thankfully we had friends who were able to check out our build was real!

The final option left to us was to take a gamble and find someone cheap to purchase and work on the bus for us. We eventually stumbled across someone who fit the bill – a carpenter in Salt Lake City who had worked on trailer conversions and was looking to break into the Skoolie market. We did our due diligence, even writing the legal contract, to make sure that we were protected. We also sent some friends round to check him out. 


Managing the build by Skype / Whatsapp with an inexperienced builder was stressful and although it worked out for us, I am not sure I’d recommend it. 


For those keen to follow in our footsteps, we’d be happy to talk to you about some safer options. After a year overseas living the Skoolie life, we now have some incredible contacts. Just get in touch.

Follow along for the ride!

Categories
Skoolie Stays

Planning a family gap year in a converted Skoolie

Planning a family gap-year in a converted Skoolie

In 2019 we decided to live differently. We quit our jobs in the U.K, rented out our home, took the kids out of school and moved into an American school bus for a year-long U.S adventure.

ruth wimpory skoolie stays

By Ruth

Can you travel in your forties?

Like lots of people our age, our twenties and thirties followed a pattern: university, backpacking, move to the city for a cool job (usually undertaken with a hangover),  find partner, do some slightly more glamorous travelling, move in together, buy a house, get married and have babies. It doesn’t have to be in that order, ours wasn’t, but we ended up ticking all those boxes in a way that felt very spontaneous and exciting.  Whoop whoop we said as we toasted our forties, we are winning at life!


Then we hit 41.

Meeting the pilots in the cockpit
We wanted to show our kids some adventures

Changing our mindset

There we were, tick-tocking along in suburbia with kids ensconced in the school system, a mortgage, a car that we needed to take the kids to their various after school activities, careers that we wanted to rethink, the occasional night out when the grandparents were available to babysit and a campervan trip every year to France. It was good, but was it good enough? Google and Facebook were regularly reminding us of our global travels pre-kids. We didn’t want to revisit the days of buckets of sangsong whisky on a Thai beach, but going travelling was just as appealing now as it was in our twenties and thirties. 

So why not? Why couldn’t we? What was actually stopping us from travelling the world? Nothing. We worked out that we could leverage our assets to give us the money we needed to travel, so we started planning. 

A globe
It was choose your own adventure time

When you can choose to travel anywhere in the world, where do you pick? A family gap year is likely to be a once in a lifetime experience, so we wanted to make sure we chose a destination that would work for all of us.


America offered deserts, mountains, plains, swamps, canyons, bears, whales, snowboarding, kayaking… cities full of great architecture, music and literary history… there was so much to see and do. On top of all of this, the language is the same, the culture and food are recognisable (our kids are good eaters but expecting them to cheerfully tuck into mondongo (sheep stomach) from a roadside cafe is a step too far) and we have friends based in the U.S that we would love to visit. 


To read more about how we settled on America, read our original travel blog.

The ultimate road-trip

Along with what we want, there is also what we need. On the most basic level this was food, drink, a bed, a vehicle and money in our pockets. 

The most cost-effective way for us to tick off all those needs was to buy an RV (a motorhome) – a tiny home we could take with us.

That was when we started thinking about what that tiny home might look with. If you are heading off on a road-trip, you need an iconic vehicle and there was a specific one that we had in mind.  

Skoolies in the UK
We did lots of research into skoolies before we left the UK - here we are trying them out for size!

Buying a skoolie

We did an enormous amount of research into the best way to convert a school bus.  Should we try and convert it ourselves? There wasn’t time. Should we pay a company to do it? We didn’t have the funds. Could we purchase someone else’s? It was all a bit last minute and risky.  Could we buy one in the UK and ship it over? No, too many import and export issues. In the end, we found a start-up builder to help us buy one and convert it. 

Project managing a builder remotely, particularly  one who was new to Skoolies, was really tough. We did our due diligence and wrote the contracts ourselves but it was a steep learning curve for both us and our builder. Overall it worked out, the bus was amazing, but we had to be flexible on our budget and ended up having to do a lot of the finish ourselves. You can see our build process here.

Budgeting for a year

Budgeting for a year
It took months to compile a budget that made us feel confident we could survive a year away

Several months before we even announced our plans to travel, the budget was an ever-growing beast of an Excel document. We factored in how much of our savings we wanted to spend on a bus and whether we could get any return on investment. We looked at our existing living expenditure, costs in North America and the reported spending of families travelling in the U.S in skoolies / RVs. We then ‘guestimated’ what it would cost us.

The word ‘guestimate’ makes it all sound a bit flippant. Don’t be deceived – we put a lot of effort into budget-planning. We had decided that, if we were going to buy a bus, we wanted to make this trip last a full year. We needed to know that we would be able to afford to eat, wash our clothes, find places to camp, have fun, visit attractions, cope with the costs of managing our UK lives from overseas and cover the costs of owning and furnishing a bus in North America. 


If you are planning your own year away, you can read our original travel blog about budgeting here.

Visas

To go to America as a visitor, you need a visa. UK citizens are eligible to apply under the ‘Visa Waiver Program’, but this only gives you up to 90 days. We obviously wanted to get our money’s worth from our big yellow bus, so needed longer. The only option for us was the much lengthier (and more expensive) process to obtain a B2 visa.

The B2 visa application meant a visit to the embassy for interview. We had to show all sorts of detail about our budget and plans, but we were well-prepared and were approved.

B2 visas allow you to stay for a maximum of a year.  That doesn’t mean you get a year though. We had read in a few places that you are at the mercy of the security officer on the day and when we arrived in Orlando we were greeted by the grumpiest face we saw in the whole of America. Mr Negativity did a lot of head shaking, telling us that our visas were not valid for more than 120 days etc. Eventually he said he’d stamp 6 months and we could reapply but he didn’t think it was likely we would be approved unless we had a VERY good reason for staying.

You can read more detail about the B2 visa application process here and, if you are wondering how we did end up staying for year, it turns out that if you have the tenacity to jump through the many hoops, don’t mind dealing with over 50 pages worth of application and supporting materials and have the funds to pay out for another application fee (ouch), you should be fine.

Applying for a B2 visa
Visas approved there was now nothing stopping us from heading to the States

And we're off to America!

Finally, after months of intense planning, we finally reached D-day… it was time to depart the UK. After all the hard work, it was a blessed relief to sit down for several hours and do nothing except watch movies.